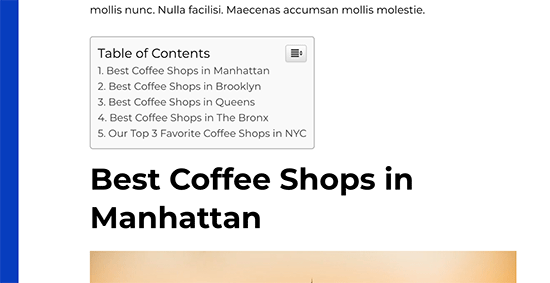
We occasionally use anchor links in our longer WordPress posts to help users quickly jump to the section they want to read.
Anchor links are often used in the table of content sections because they help users move up and down a lengthier article without reloading the page. It can also help with SEO as Google may show them below your search listings for easy navigation (more on this later).
In this step by step guide, we will explain what are anchor links and show you how to easily add anchor links in WordPress.
What is an Anchor Link?
An anchor link is a type of link on the page that brings you to a specific place on that same page. It allows users to jump to the section they’re most interested in.
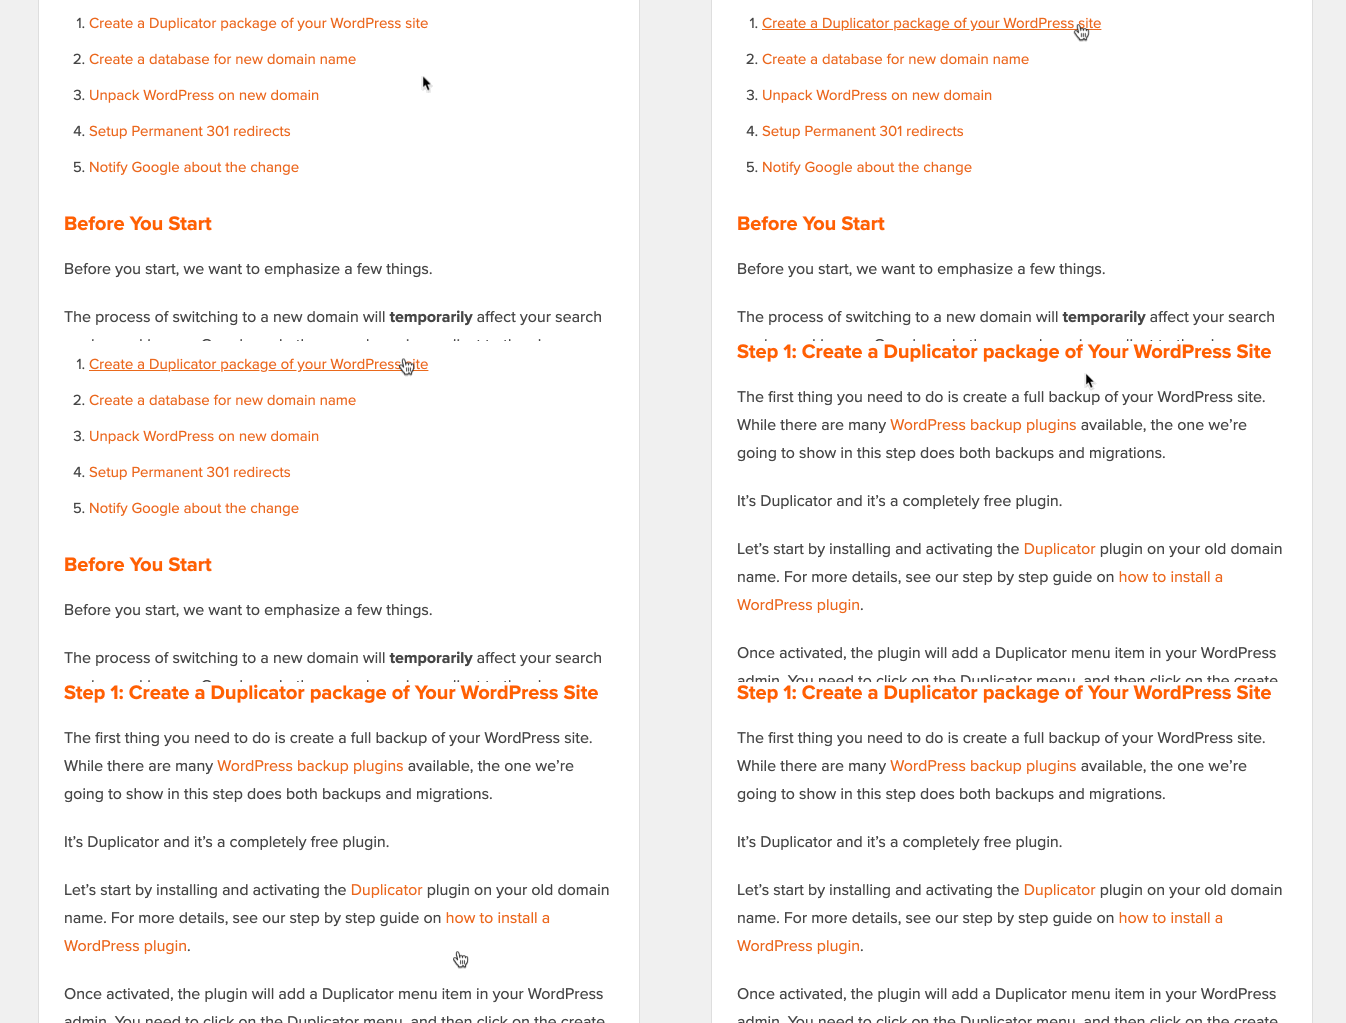
Take a look at the animated screenshot below:
As you can see, clicking on the anchor link takes the user to the specific section on the same page.
Anchor links are commonly used in lengthier articles as the table of content which allows users to quickly jump to the sections they want to read.
Why and when you should use anchor links?
An average user spends less than a few seconds before deciding if they want to stay or leave your website. You have just those few seconds to convince users to stay.
The best way to do that is to help them quickly see the information they’re looking for.
Anchor links make this easier by allowing users to skip the rest of the content and jump directly to the part that interests them. This improves user experience and helps you win new customers / readers.
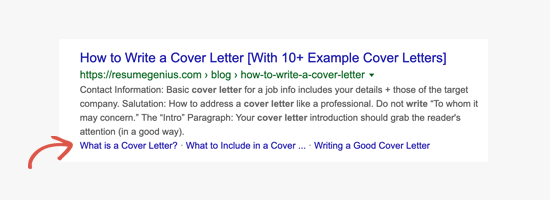
Anchor links are also great for WordPress SEO. Google can display an anchor link in the search results as a “jump to link”.
Sometimes Google can also display several links from that page as jump to links, and this is proven to increase the click-through rate in search results. In other words, you get more traffic to your website.
Having said that, let’s take a look at how to easily add anchor links in WordPress.
How to Manually Add Anchor Links in WordPress
If you just want to add a few anchor links in your article, then you can easily do so manually.
Basically you need to add two things for an anchor text to work as intended.
- Create an anchor link with a # sign before the anchor text.
- Add the
idattribute to the text where you want the user to be taken.
Let’s start with the anchor link part.
Step 1. Creating an anchor link
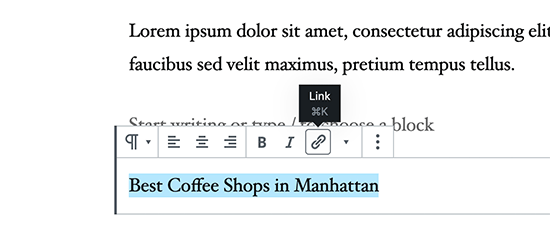
First you need to select the text that you want to link and then click on the insert link button in the WordPress Gutenberg editor.
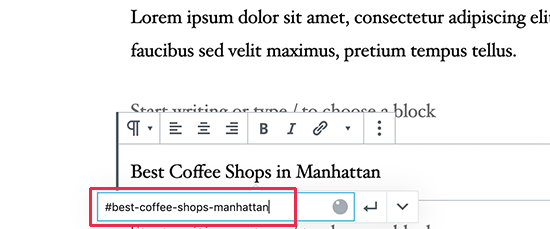
This will bring up the insert link popup where you usually add the URL or look for a post or page to link.
However, for an anchor link, you’ll simply use # as prefix and enter the keywords for the section you want the user to jump to.
After that click on the enter button to create the link.
Some helpful tips on choosing what text to use as your anchor # link:
- Use the keywords related to the section you are linking to.
- Don’t make your anchor link unnecessarily long or complex.
- Use hyphens to separate words and make them more readable.
- You can use capitalization in anchor text to make it more readable. For example:
#Best-Coffee-Shops-Manhattan.
Once you add the link, you will be able to see the link you have created in the editor. However, clicking on the link doesn’t do anything.
That’s because the browsers cannot find the anchor link as an ID.
Let’s fix that by pointing browsers to the area, section, or text that you want to show when users click on the anchor link.
Step 2. Add the ID attribute to the linked section
In the content editor, scroll down to the section that you want the user to navigate to when they click on the anchor link. Usually, it is a heading for a new section.
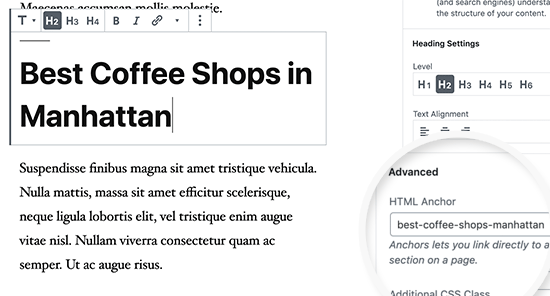
Next, click to select the block and then in the block settings click on the Advanced tab to expand it. You can simply click on the ‘Advanced’ tab under the heading block settings.
After that, you need to add the same text that you added as the anchor link under the ‘HTML Anchor’ field. Make sure that you add the text without the # prefix.
You can now save your post and see your anchor link in action by clicking on the preview tab.
What if the section you want to show is not a heading but just a regular paragraph or any other block?
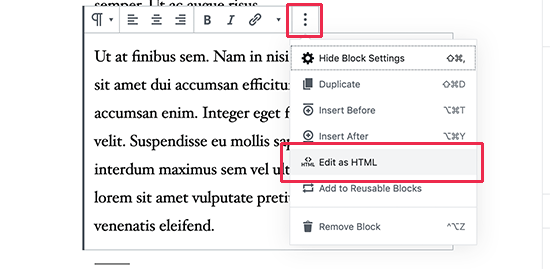
In that case, you need to click on the three-dot menu on the block settings and select ‘Edit as HTML’.
This will allow you to edit the HTML code for that particular block. You need to select find the HTML tag for the element you want to point to. For example, <p> if it is a pagraph, or <table> if it is a table block, and so on.
Now, you need to add your anchor as the ID attribute to that tag, like the following code:
1 | <p id="best-coffee-shops-manhattan"> |
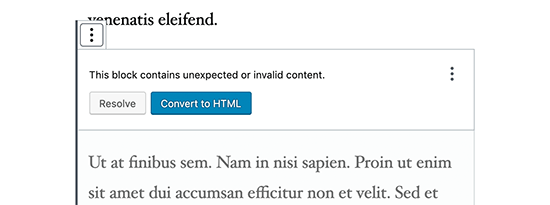
You will now see a notice that this block contains unexpected or invalid content. You need to click on the convert to HTML to preserve the changes you made.
How to Manually Add Anchor Link in Classic Editor
If you are still using the older classic editor for WordPress, then here is how you can add the anchor link.
Step 1. Create the anchor link
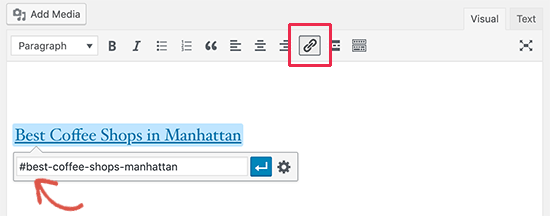
First, select the text that you want to change into the anchor link and then click on the ‘Insert Link’ button.
After that, you need to add your anchor link with a # sign prefix followed by the slug you want to use for the link.
Step 2. Add the ID attribute to the linked section
The next step is to point the browsers to the section you want to show when users click on your anchor link.
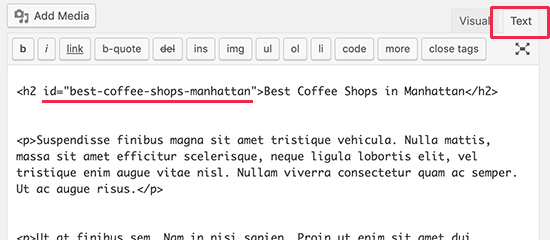
For that, you’ll need to switch to the ‘Text’ mode in the classic editor. After that scroll down to the section that you want to show.
Now locate the HTML tag you want to target. For example, <h2>, <h3>, <p>, and so on.
You need to add the ID attribute to it with your anchor link’s slug without the # prefix, like this:
1 | <h2 id="best-coffee-shops-manhattan"> |
You can now save your changes and click on the preview button to see your anchor link in action.
How to Manually Add Anchor Links in HTML
If you are used to writing in the Text mode of the old Classic Editor in WordPress, then here is how you would manually create an anchor link in HTML.
First, you need to create the anchor link with a # prefix using the usual <a href=""> tag, like this:
1 | <a href="#best-coffee-shops-manhattan">Best Coffee Shops in Manhattan</a> |
Next, you need to scroll down to the section that you want to show when users click on the link.
Usually, this section is a heading (h2, h3, h4, etc.), but it could be any other HTML element or even a simple paragraph <p> tag.
You need to add the ID attribute to the HTML tag, and then add the anchor link slug without the # prefix.
1 | <h2 id="best-coffee-shops-manhattan">Best Coffee Shops in Manhattan</h4> |
You can now save your changes and preview your website to test the anchor link.
How to Automatically Add Headings as Anchor Links in WordPress
This method is suitable for users who regularly publish long-form articles and need to create table of contents with anchor links.
The first thing you need to do is install and activate the Easy Table of Contents plugin.
This plugin allows you to automatically generate a table of contents with anchor links. It uses headings to guess the content sections, and you can customize it fully to meet your needs.
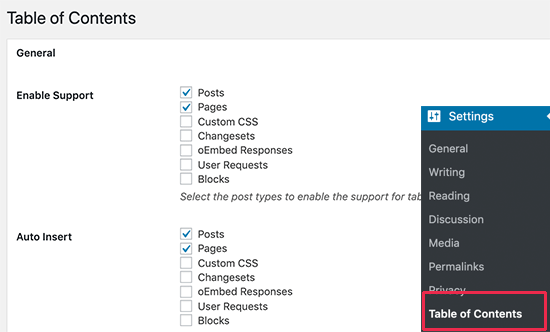
Upon activation, simply go to Settings » Table of Contents page to configure plugin settings.
First, you need to enable it for the post types where you want to add table of contents. By default, the plugin is enabled for pages, but you can also enable it for your posts as well.
You can also enable the auto-insert option. This allows the plugin to automatically generate the table of contents for all articles, including the older articles that match the criteria.
If you only want to automatically generate table of contents for specific articles, then you can leave this option unchecked.
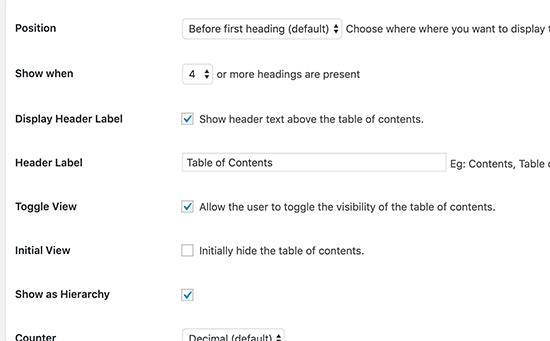
Next, scroll down a little to select where you want to display the table of contents and when you want it to be triggered.
You can review other advanced settings on the page and change them as needed.
Don’t forget to click on the ‘Save Changes’ button to store your settings.
If you enabled the auto-insert option, then you can now view an existing article with the specified number of headings.
You’ll notice that the plugin will automatically display a table of contents before the first heading in the article.
If you wanted to manually generate table of contents for specific articles, then you need to edit the article where you want to display a table of contents with anchor links.
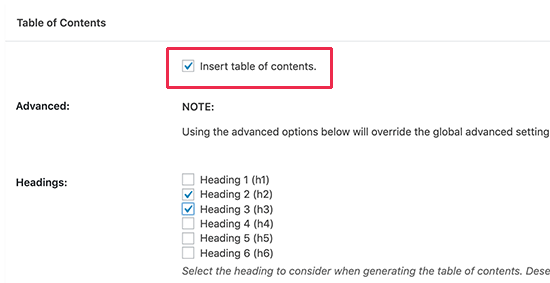
On the post edit screen, scroll down to the ‘Table of Contents’ tab below the editor.
From here, you can check the ‘Insert table of contents’ option and select the headings you want to include as anchor links.
You can now save your changes and preview your article. The plugin will automatically display a list of anchor links as your table of contents.
We hope this article helped you learn how to easily add anchor links in WordPress.
