Would you like to limit login attempts in WordPress?
Hackers may use a brute force attack to try to guess your admin password. If you limit the number of times they can attempt to log in, then you significantly reduce their chances of success.
In this article, we will show you how and why you should limit login attempts on your WordPress site.
Why Should You Limit Login Attempts in WordPress?
A brute force attack is a method that uses trial and error to hack into your WordPress website.
The most common type of brute force attack is password guessing. Hackers use automated software to keeping guessing your login information so they can gain access to your website.
By default, WordPress allows users to enter passwords as many times as they want. Hackers may try to exploit this by using scripts that enter different combinations until they guess the right login.
You can prevent brute force attacks by limiting the number of failed login attempts per user. For example, you could temporarily lock a user out after 5 failed login attempts.
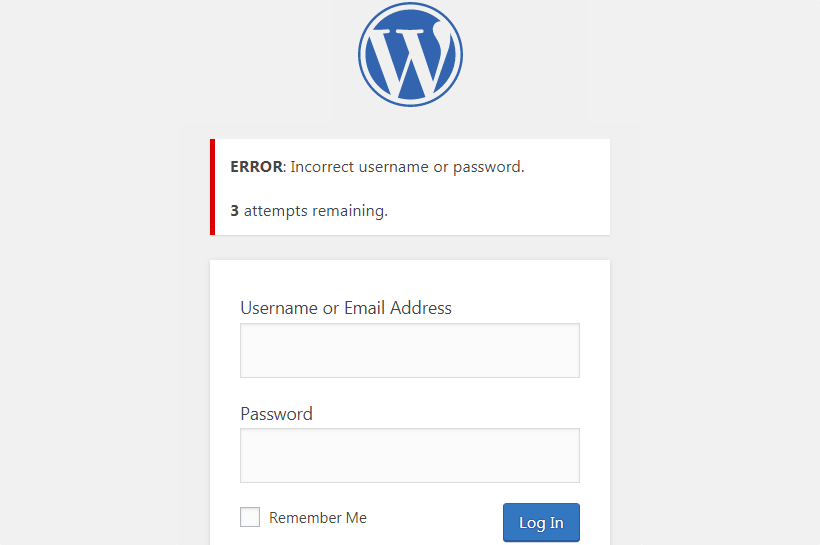
Unfortunately, some users find themselves locked out of their own WordPress website after typing their password incorrectly a number of times.
With that being said, let’s take a look at how to limit login attempts on your WordPress website.
How to Limit Login Attempts in WordPress
The first thing you need to do is install and activate the Limit Login Attempts Reloaded plugin.
The free version is all you need for this tutorial. Upon activation, you should visit the Settings » Limit Login Attempts page, and then click on the Settings tab at the top.
The default settings will work for most websites, but we’ll walk you through how you can customize the plugin settings for your site.
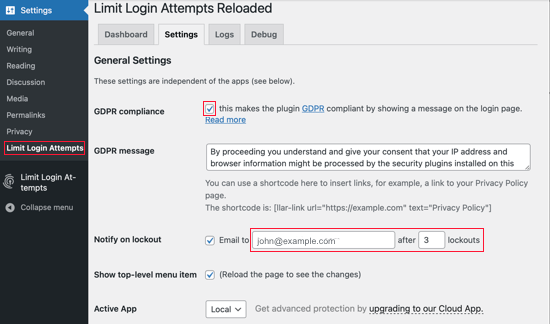
To be compliant with GDPR laws, you can click the ‘GDPR compliance’ checkbox to show a message on your login page.
Next, you’ll choose whether to be notified when someone has been locked out. You can change the email address the notification is sent to if you wish. By default, you will be notified the third time the user is locked out.
After that, you should scroll down to the Local App section where you can define how many login attempts can be made and how long a user will have to wait before they can try again.
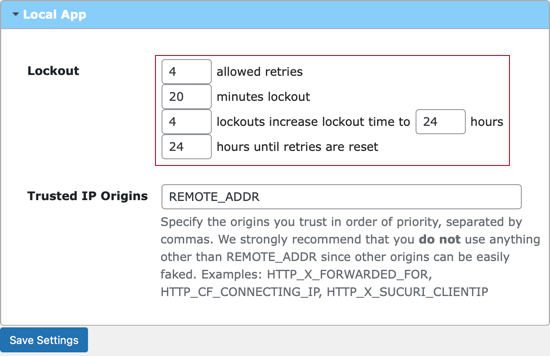
First, you need to define how many login attempts can be made. After that, choose how many minutes a user will have to wait if they exceed that number of failed attempts. The default value is 20 minutes.
You can also increase the wait time once the user has been locked out a specified number of times. For example, the default settings will not allow the user to attempt to log in for 24 hours once they have been locked out 4 times.
It’s recommended that you do not change the ‘Trusted IP Origins’ setting for security reasons.
Don’t forget to click the Save Settings button at the bottom of the screen to store your changes.
Pro Tips on How to Protect Your WordPress Website
Limiting login attempts is just one way to keep your WordPress site secure.
The first layer of protection to your WordPress sites is your passwords. You should always use strong passwords on your WordPress site.
Strong passwords can be difficult to remember, but you can use a password manager to make it easy.
If your WordPress login page is still being attacked, then another layer of protection you can add is Google reCAPTCHA for WordPress login. This will further help reduce the DDoS attacks.
No website is 100% safe because hackers always find new ways to get around the system. That’s why it’s crucial that you keep complete backups of your WordPress site at all times. We recommend using the UpdraftPlus or another popular WordPress backup plugins.
If your website is a business, then we strongly recommend that you add a firewall that takes care of the brute force attacks and so much more.