WordPress is the most popular website builder platform today. It powers more than 34% of the internet, and every day 616 new WordPress Websites are created.
So we are not that surprised that you have chosen to create your new website using WordPress.
However, you might not be sure where to begin, and It could be overwhelming when you first get started.
Well, you can relax – you have come to the right place.
In this guide, we will show you how to make a WordPress website in less than an hour.
To help you with your journey of creating a WordPress Website, we will cover the following steps:
STEP 1 – Register and Purchase a Domain Name
The first step in your journey to creating a WordPress website is to purchase a domain name.
If you have already done this – feel free to skip.
If not, follow along as we will answer some commonly asked questions when purchasing a domain.
1.1 What Is a Domain Name?
Chances are you have already decided on your business name.
Now we need to find you a domain name.
The domain name is your website name. It is the name people will use to find your website on the internet.
It is what they will type into the address bar to reach your website.
Let’s say your business name is John’s Pizza – then you would have a domain name johnspizza.com.
Since your intention is to make your own WordPress website – then we can assume that you perhaps already know this.
Most internet users are familiar with this (even if they don’t know the technical term for it).
1.2 Should You Choose a “.com” Domain Name?
Most of us recognize the most common domain extension – .com
All your favorite websites that you visit every day – “google.com”, “facebook.com”, “netflix.com’ – all use the universal .com domain extension.
However, you don’t always have to choose the same to make your WordPress website.
The domain extension you choose will depend on your business situation, requirements, location, industry, etc.
There are over 500+ domain extensions in the market, and ultimately the choice is yours.
We recommend you choose a .com domain because it is the most common and widely recognized.
STEP 2 – Choose a Hosting Provider
The next step in the process of creating your WordPress website is to choose a hosting provider.
2.1 What Is a Hosting Provider?
A good web hosting service is what makes your website (it’s content, pages, images, etc) accessible to your users on the WorldWideWeb.
All your website data and information are stored in the hosting provider’s servers, and every time a user sees or searches something on your website – it is routed from service providers servers to visitors’ browser tab.
2.2 Where Can You Purchase Hosting?
In some cases, the domain registrars such as GoDaddy, Name sell their own hosting services.
However, most website users tend to use another service or provider for their hosting needs.
The hosting provider you choose depends on your needs, your location, privacy requirements, scalability, speed, etc.
2.3 Choosing a Reliable Hosting Provider
We recommend ASPHostPortal as they provide top performance and keep your websites secure with advanced approaches. They have amazing customer support that can help you through every step.
SiteGround becomes the best choice as their servers are specifically optimized for WordPress. They provide WordPress support, easy WordPress install, auto-updates, an in-house built WordPress Starter tool for easily starting a website. Additionally, they provide WP caching plugin that drastically speeds up the site’s performance.
We recommend ASPHostPortal to create your WordPress website because of it’s simplistic client dashboard and the ease of use.
STEP 3 – Install WordPress
In just a couple of clicks, you can set up your WordPress.
There are a few different autoinstallers you might encounter:
- Softaculous
- Fantastico
- QuickInstall
- MOJO Marketplace
And while there might be a few minor interface differences, all of the autoinstallers more or less function the same. So while I’ll show you an example using Softaculous, the exact interface for your autoinstaller might look a tiny bit different.
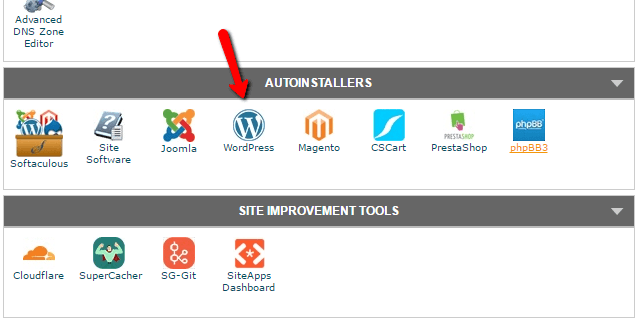
To get started, find the link to the WordPress autoinstaller in cPanel and give it a click:
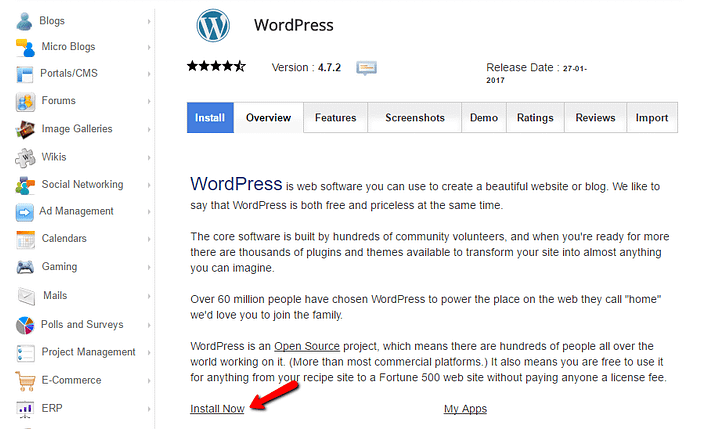
On the next screen, you should see an Install Now link (no matter which autoinstaller you’re using). Just give that another click:
Next, you’ll need to enter details for your WordPress install. Again, this interface should generally look the same no matter which autoinstaller you’re using.
First, fill in the protocol and domain name where you want to install WordPress:
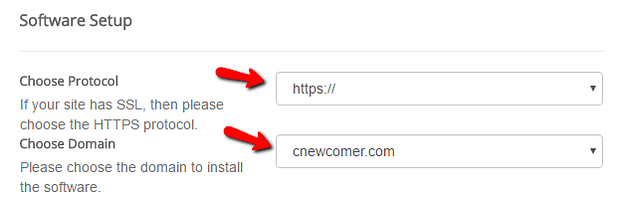
For Protocol, if you’re using an SSL certificate, you should choose HTTPS. Otherwise, you should choose HTTP. Unless you purposefully installed an SSL Certificate, the default is HTTP.
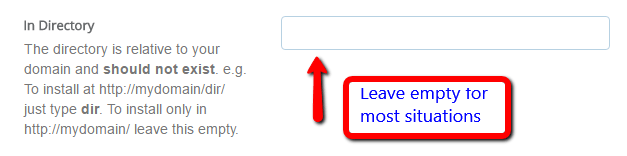
Next, choose the directory in which you want to install WordPress. For 99% of situations, you should leave this field blank. Leaving it empty means WordPress will be installed at your main domain. That is, if your domain is YOURDOMAIN.com, then WordPress will be installed at YOURDOMAIN.com rather than something like YOURDOMAIN.com/mywpsite.
A bit further down, you need to enter your Site Settings. These are just the default values for your site’s name and description. You can always change them later from the WordPress interface:
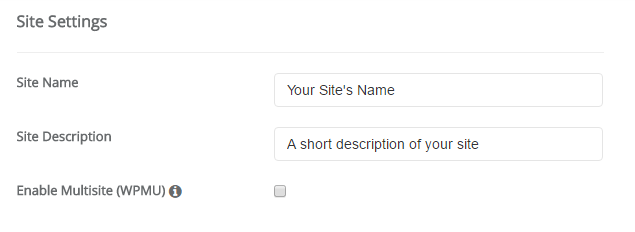
Do not enable WordPress Multisite unless you’re specifically trying to create a multisite network.
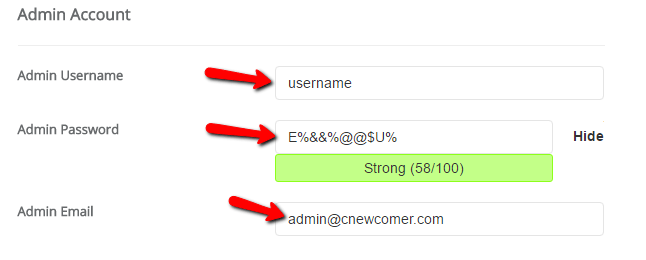
You’ll also need to create login credentials for your WordPress account. You’ll use this username/password combination to log into your WordPress dashboard after installation, so make sure that you remember it:
Depending on the specific autoinstaller that you’re using, you might see a few other options as well. You can safely ignore these. That is, it’s fine to leave anything I didn’t cover as the defaults.
Once you’ve filled out everything, make sure to click Install at the bottom of the screen. It might take a minute or so to run. Then, you should get a confirmation. You can log into your brand new WordPress install by going to YOURDOMAIN.com/wp-admin.
STEP 4 – Select and Install a WordPress Theme
You have now built the infrastructure supporting your website (domain name, hosting and WordPress).
Next, we will talk about customizing your website in the next few steps..
The first step is to find and install a theme.
4.1 What is a WordPress Theme?
Here is the official definition from WordPress.org.
“A WordPress theme changes the design of your website, often including its layout.
Changing your theme changes how your site looks on the front-end, i.e. what a visitor sees when they browse to your site on the web. “ WordPress.org
A WordPress theme allows you to customize and personalize how your site looks and feels based on your requirements and branding guidelines.
With the help of a theme – you are able to customize the layout, structure, colors, appearance of your website.
4.2 Free Themes vs Paid Themes
If you need basic functionality on your website, then you would go with a free theme.
For example, if you are a solopreneur and you are using your website just to showcase your brand – a free theme would accomplish most of your needs.
However, there are limitations in terms of what you can change or update.
Hence there are paid themes.
They offer more personalization, customization and additional functionality over free themes.
There are over 10000+ themes available in the WordPress ecosystem to choose from.
The average price of a paid theme varies anywhere from $40 to $60 depending on the vendors and options.
4.3 Where to Find a Theme That Suits You?
You can start with WordPress.org and search for many options.
Login into your WordPress Dashboard.
Click on Appearance, and then on Themes.
You will notice some options there, and also the ability to search for other themes as well.
You also have the option to upload a theme

You will notice this screen where it shows you the different options to choose a Page Builder.
We are going to choose the Elementor Website Builder(Page Builder) from the list below.
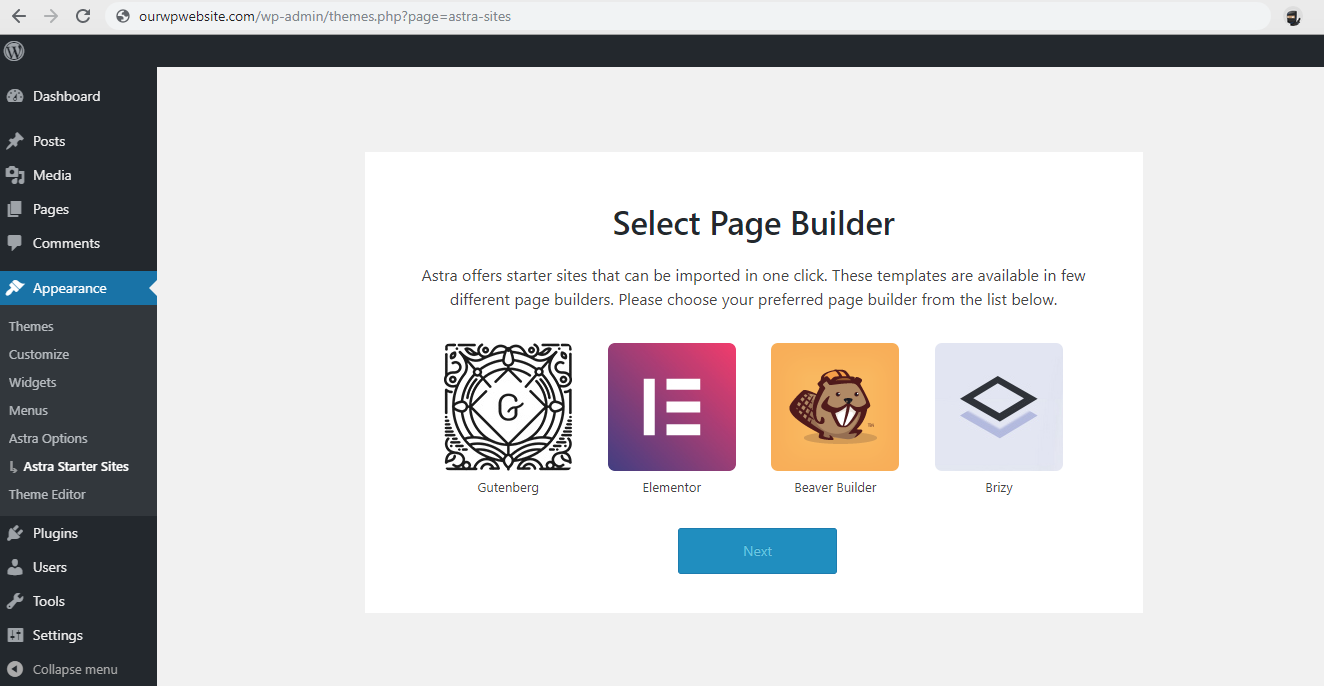
In less than 2 minutes, the Elementor Website Builder will be installed.
Once installed go back to your WordPress Dashboard.
Under Appearance, you will now see a few more options:
- Astra Options
- Starter Templates
Choose the Starter Templates, and you will see a library of 100+ templates you can choose from.
For demo purposes, we are going to choose one of the Free Starter Site – the Life Coach template.
In less than 30 seconds, the Starter Site will be imported and setup.

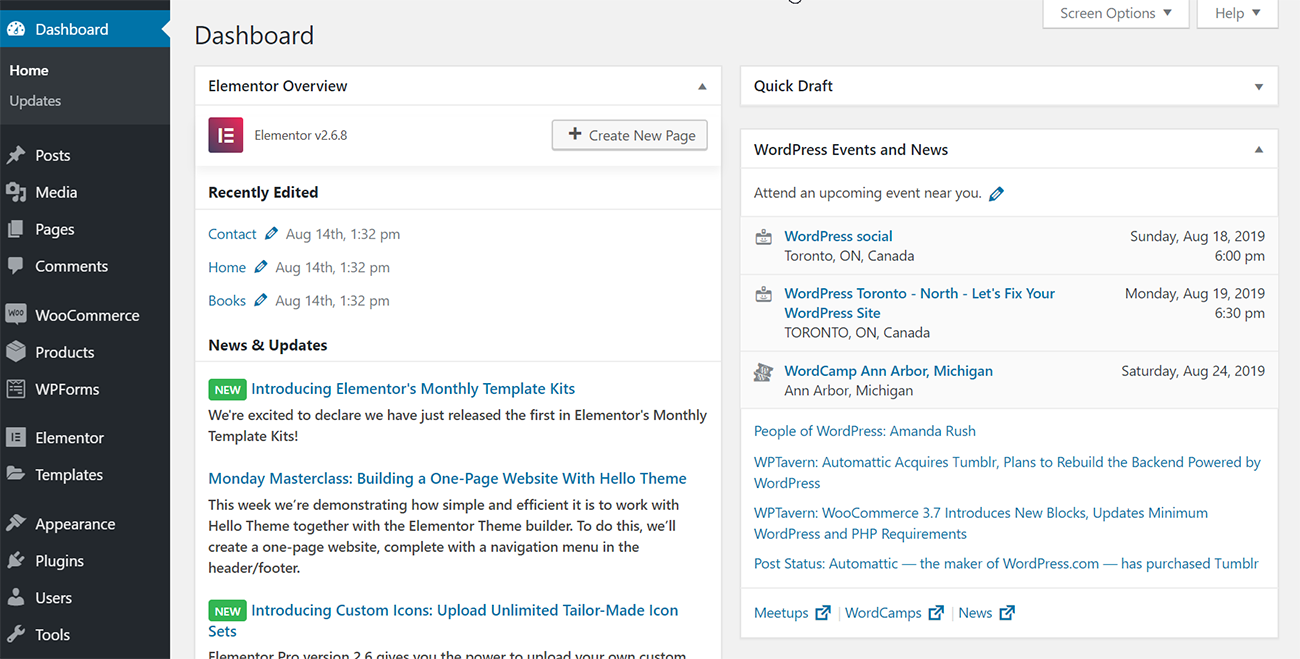
This is how your WordPress Dashboard will look once the Starter Site is imported.
At this point, this is how the live website will look like.

This is just a template, and we need to make it look like your website.
We will cover that in length in the next section of this guide.
STEP 5 – Customize & Personalize Your WordPress Website
The benefits of WordPress is that you don’t need to learn coding to create a website.
Even if you are a non-techie – you are able to get up and running with a new website very quickly,500+ new websites are created every day using WordPress.
With the help of Starter Templates – we will show you how can do that even faster.
In this section – we will show you how to customize your WordPress website that’s consistent with your branding and style guidelines (all without having to type a single line of HTML/CSS code).
Head over to your WordPress Dashboard.
Click on Appearance, and then Customize.
We can imagine how confusing it can be especially if this is your very first attempt at WordPress.
To make it simpler – we created a customizer that is easy to use.
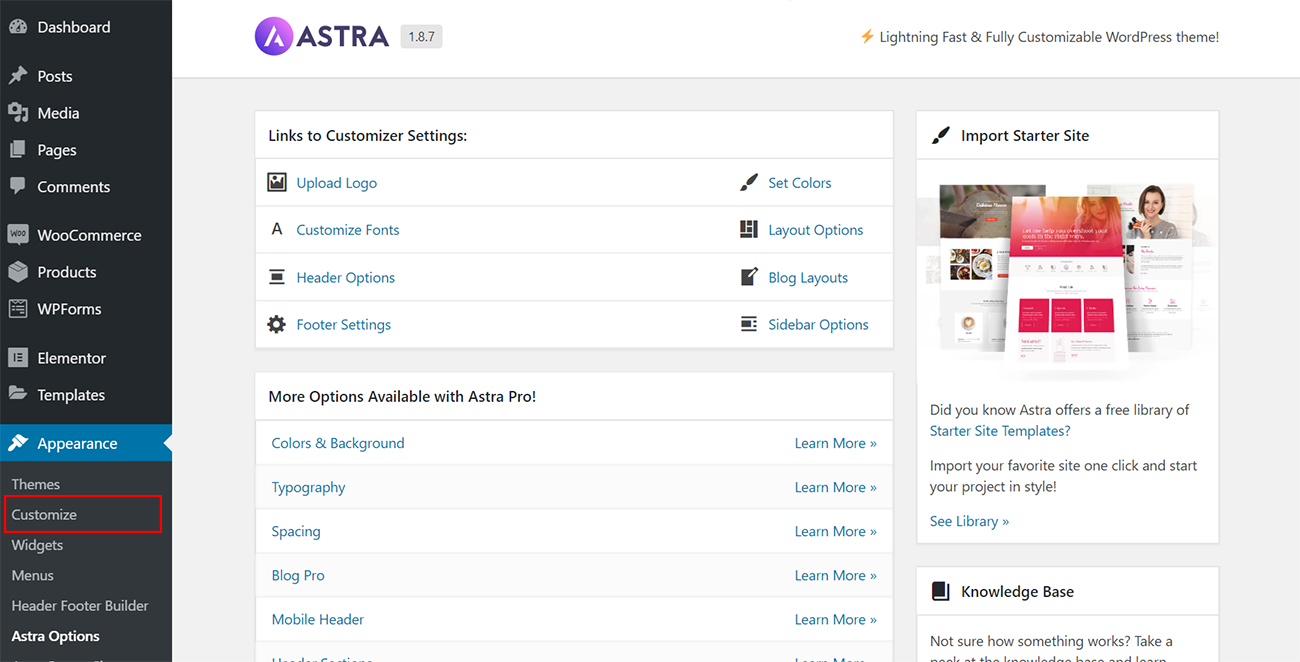
Head over to your WordPress Dashboard.
Under Appearance – choose Astra Options.
You will see this page that shows all the shortcuts, and you can pick and choose what to customize.
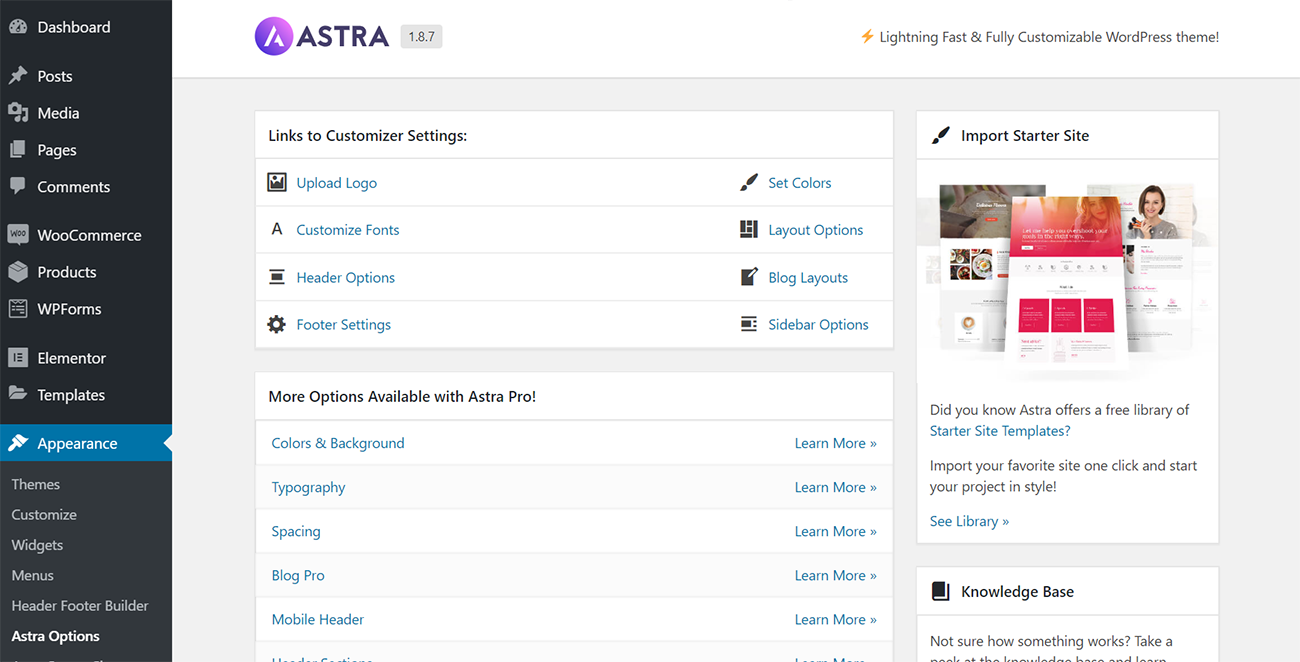
In the next few minutes, we will discuss how to update the following using Astra Options:
- Update Logo and Site Title
- Updating Colors
- Updating Typography
- Updating Layouts
5.1 Updating Logo and Site Title
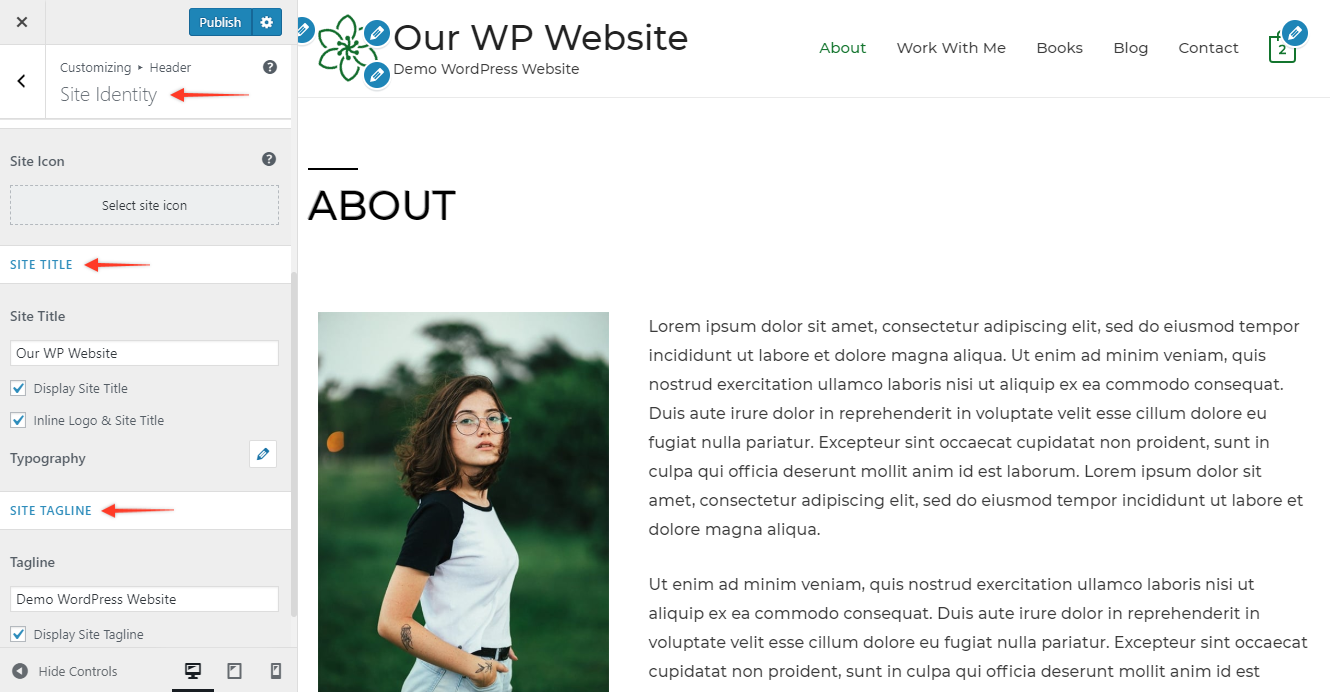
Head over to your WordPress Dashboard. Under Appearance and under Astra Options section – Choose Upload Logo button.
This will take you to the customizer page where you are able to update your logo, your site title and tagline right here.
You can also see a live preview as you are making these changes.
Once you are satisfied, hit the blue Publish button and the changes will be updated live on your site.
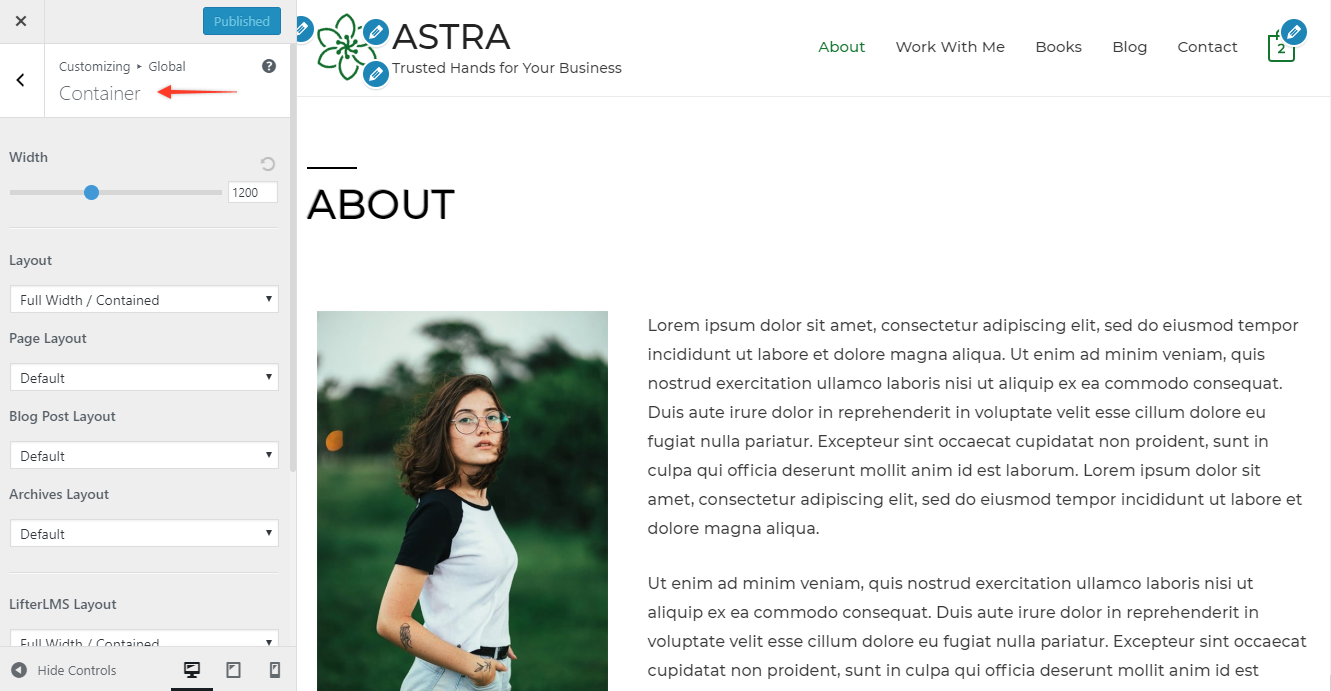
5.2 Updating Colors
You might already have brand guidelines for your business, and you want to make sure that your website is consistent is with those brand colors.
Head over to your WordPress Dashboard. Under Appearance and under Astra Options section – Choose “Set Colors” button.

You will see this screen, and you will notice a list of all the different places that you can control or update the colors on your website.

You can also see the changes impact your website – with the help of the live preview.
Once you have made all the color changes to your website using this customizer – make sure to hit the blue button Published to make the changes live.
5.3 Updating Typography
You might also have style guidelines, and you might want to use those all across your WordPress website.
With the help of the customizer – you can control the fonts, font size(s) for each and every element of your website.
Even if you don’t have style guidelines – you can start with some of the defaults that are already included.
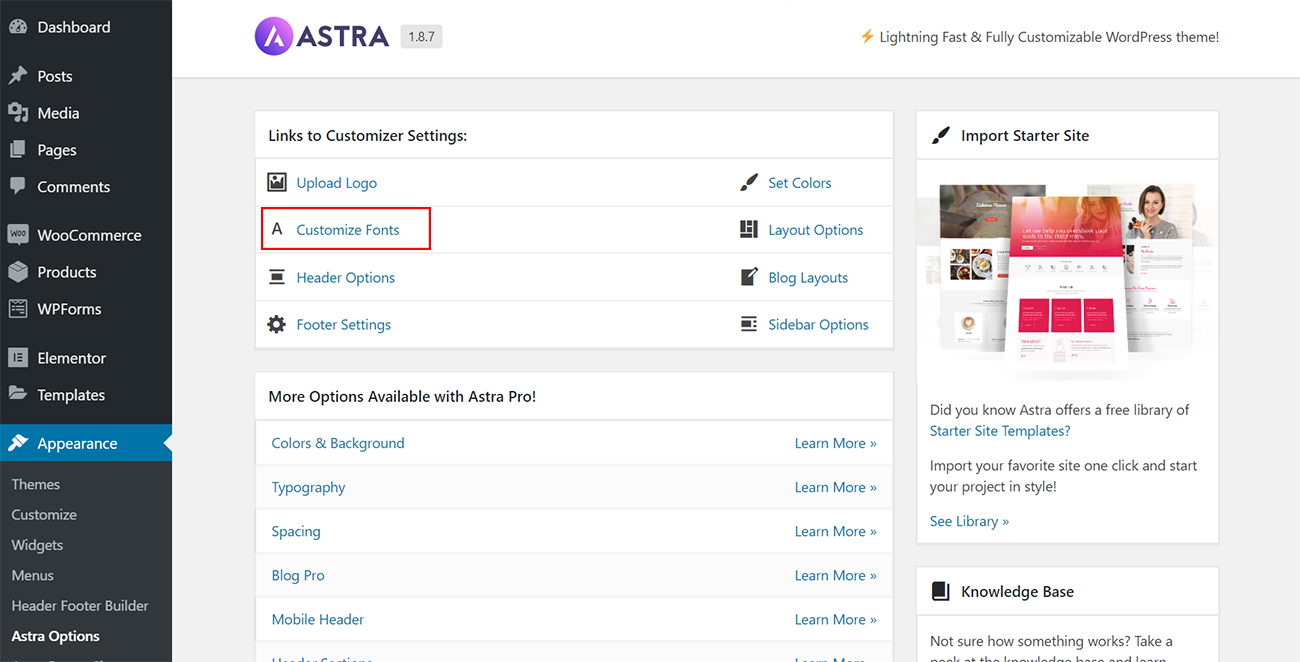
Head over to your WordPress Dashboard. Under Appearance and under Astra Options section – Choose “Customize Options”.
You will notice all the places that you can make changes.
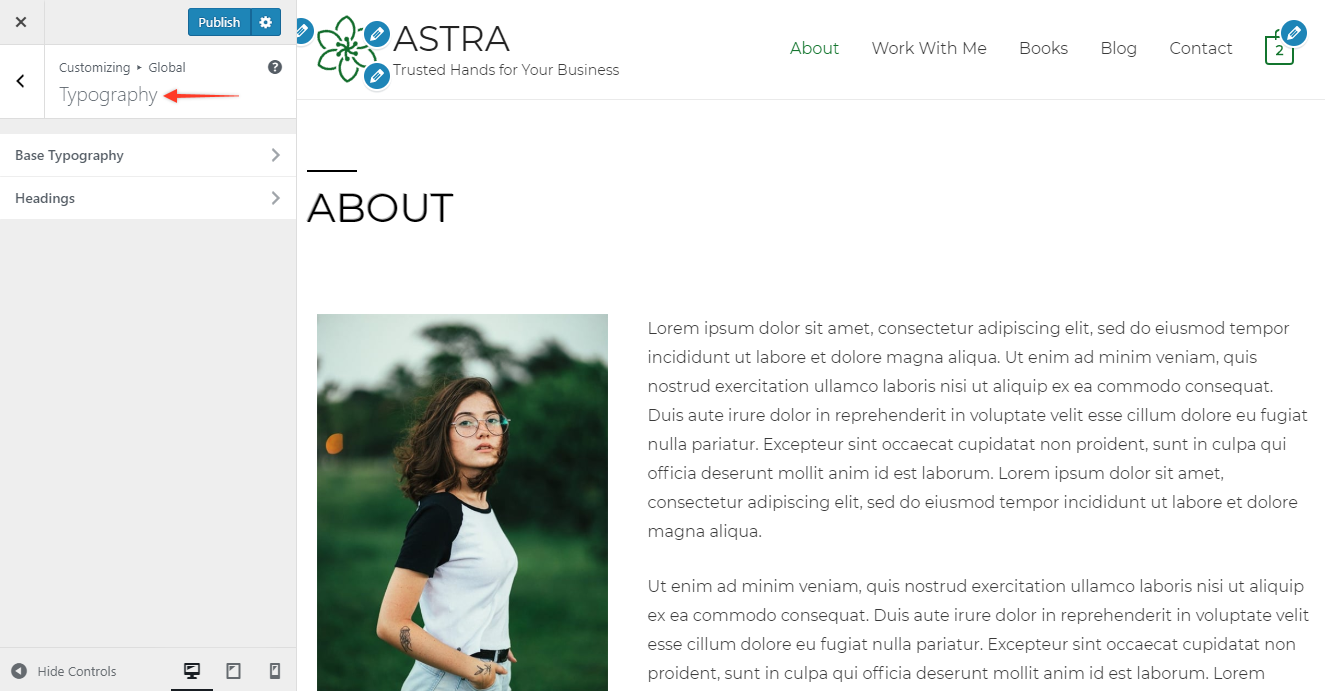
Once you have made all the changes to the fonts for the typography of different sections – make sure to hit the blue button Published to make the changes live.
5.4 Updating Layouts
Head over to your WordPress Dashboard. Under Appearance and under Astra Options section – Choose Choose Layout Options

You can see all the available options to update the look-and-feel of your WordPress website.
You have control over how the various elements of your site (header, footer, blogs,etc.) can eventually look
Take a look at this video – we will show you how easy it is to make changes to your Header.
You are able to play around with a few options, and like always you can see the live preview.
Once you have made all the changes to the layouts of different sections – make sure to hit the blue button Published to make the changes live.
STEP 6 – Update your WordPress Settings
Once you have made all the front-end changes as discussed in the previous section, let’s look at some more settings that you need to make.
You have a few settings here to update:
- General Settings
- Writing
- Reading
- Discussion
- Permalinks
- Privacy
Let’s quickly go through them, and also learn how to make the necessary changes.
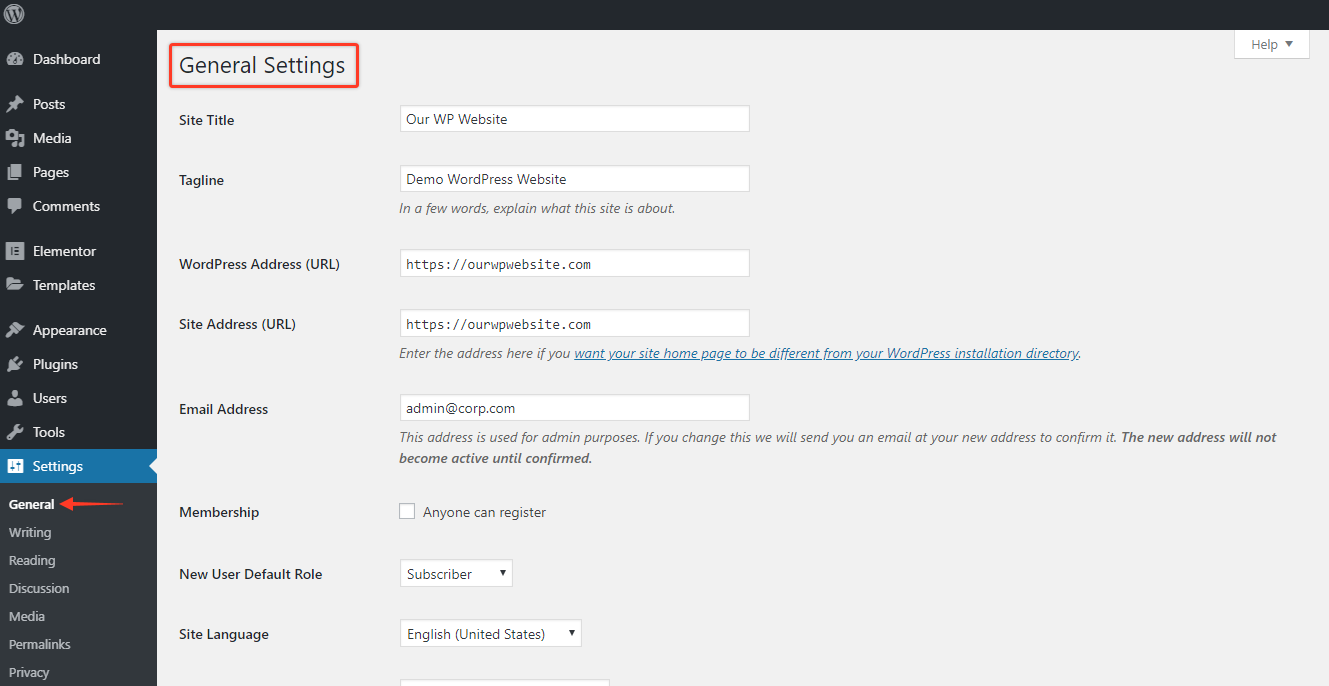
6.1 General Settings
Head over to your WordPress Dashboard.
Under Settings choose General Settings
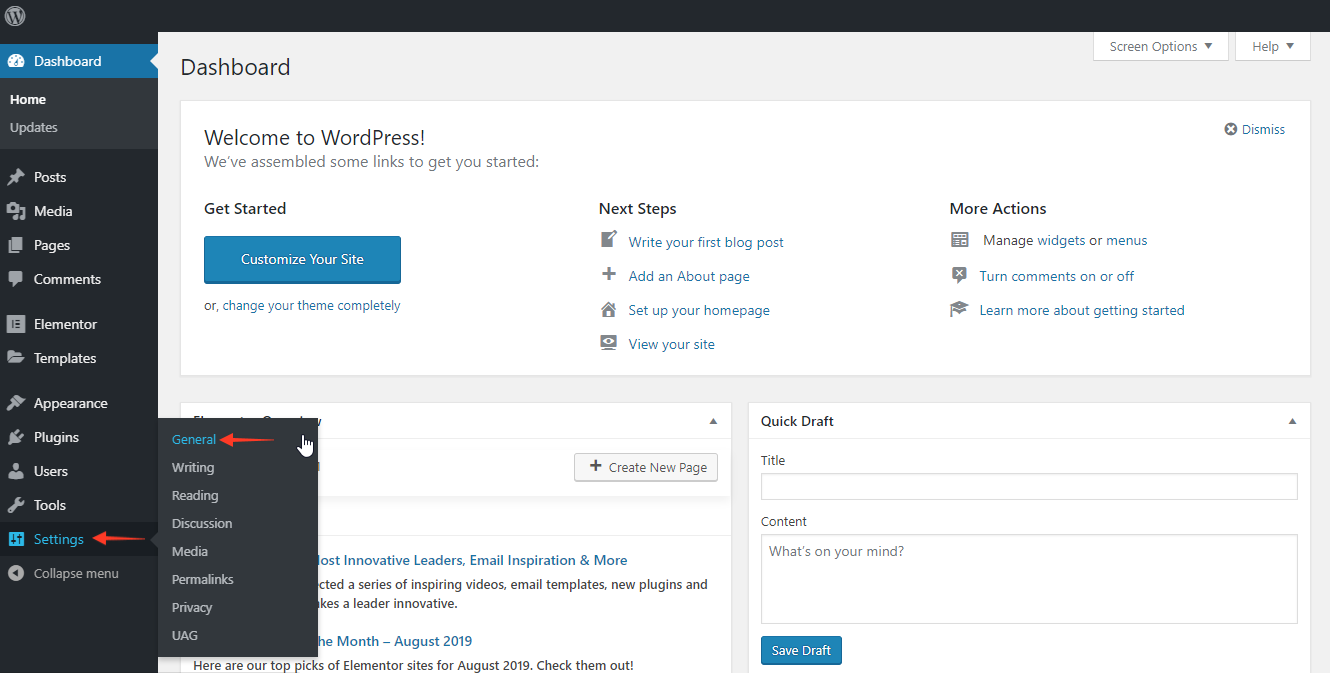
This is where you set some roles and rules on your website.
For example, the default time zone, date format, language, etc.
In addition, you can also set up how you want visitors to register on your website.
Since we have already changed the Site Title and Tagline using the Astra Customizer – you can see that it has already been updated here.
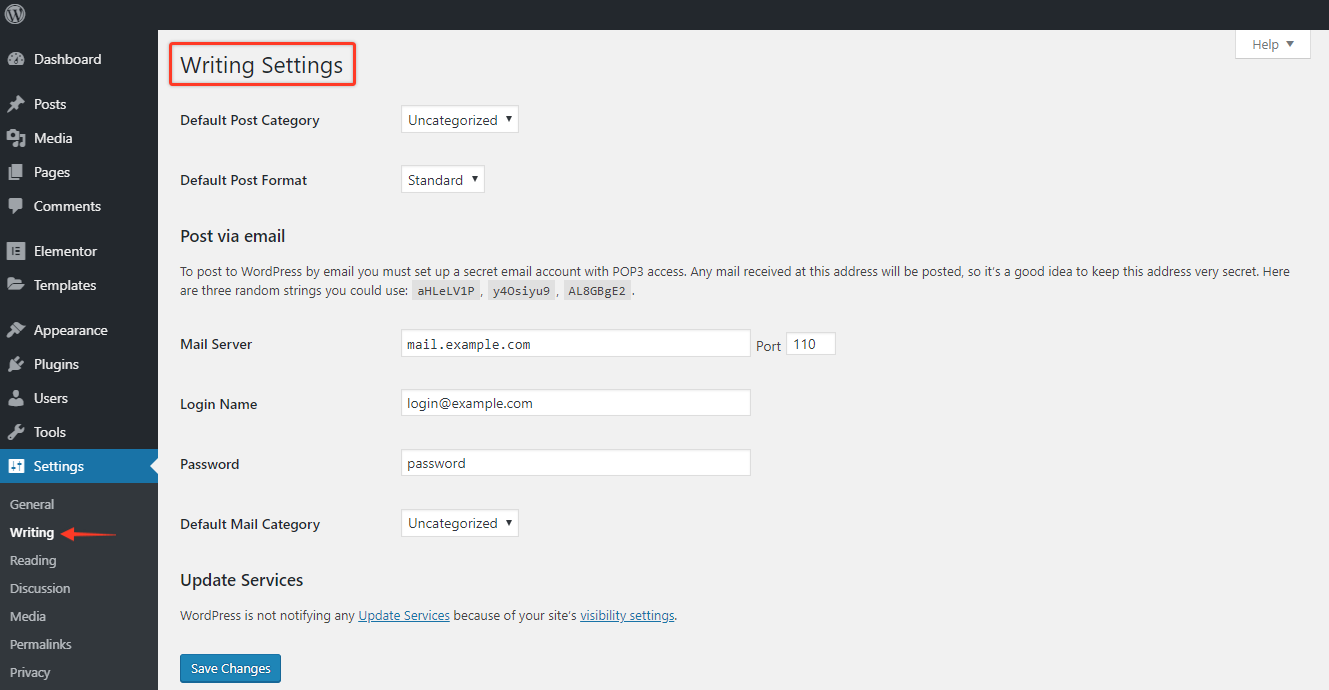
6.2 Writing Settings
Next, in the Writing section – you will notice some of the default settings for your default Post Category and Post Format.
You don’t necessarily need to update this today during your initial WordPress website setup.
As you start creating blog posts – you can update this format type.
6.3 Reading Settings
In the Reading Settings, you can set up how all your posts or pages will be displayed.
This is what your readers will see when they visit your website.
You can choose what you want to display on the Home Page when they first visit.
Do you want to show a particular page, blog posts or the home page? You can set that up here.
For today, you can leave these settings unchanged.
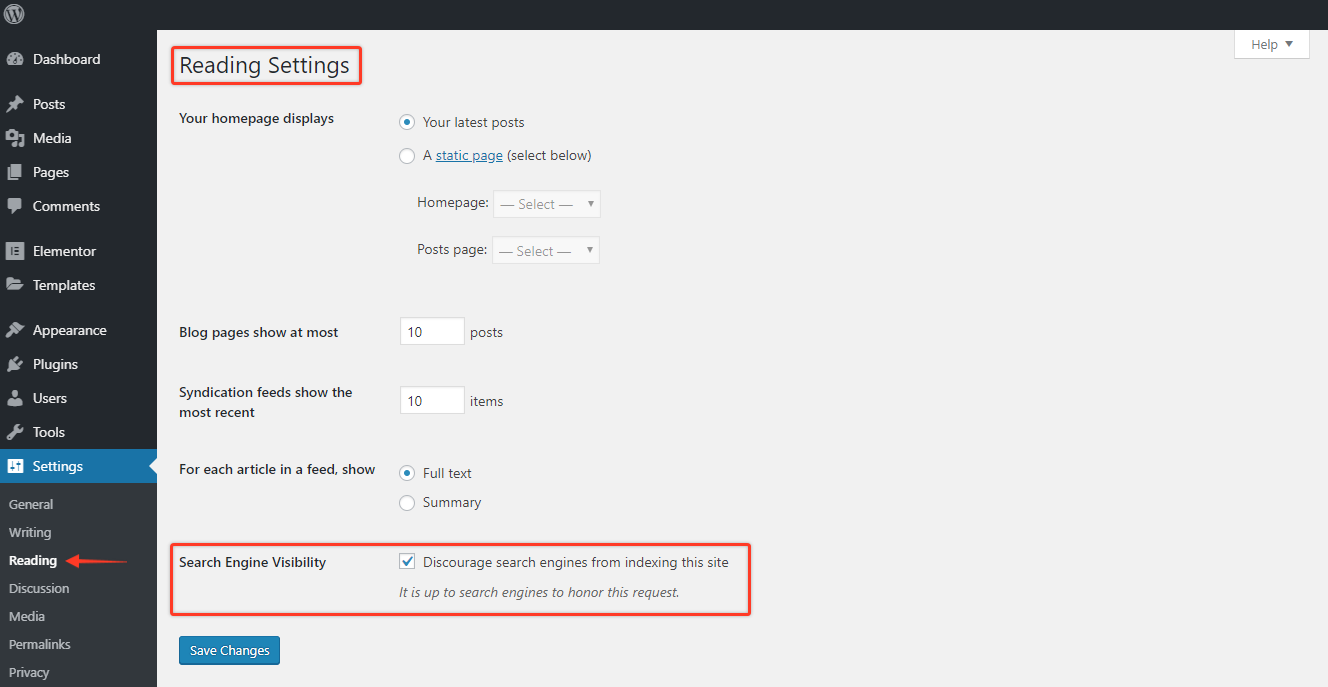
PRO TIP:
Make sure that you leave the Search Engine Visibility unchecked.
You want to ensure that as you publish new pages and new posts – your site gets indexed by the search engines.
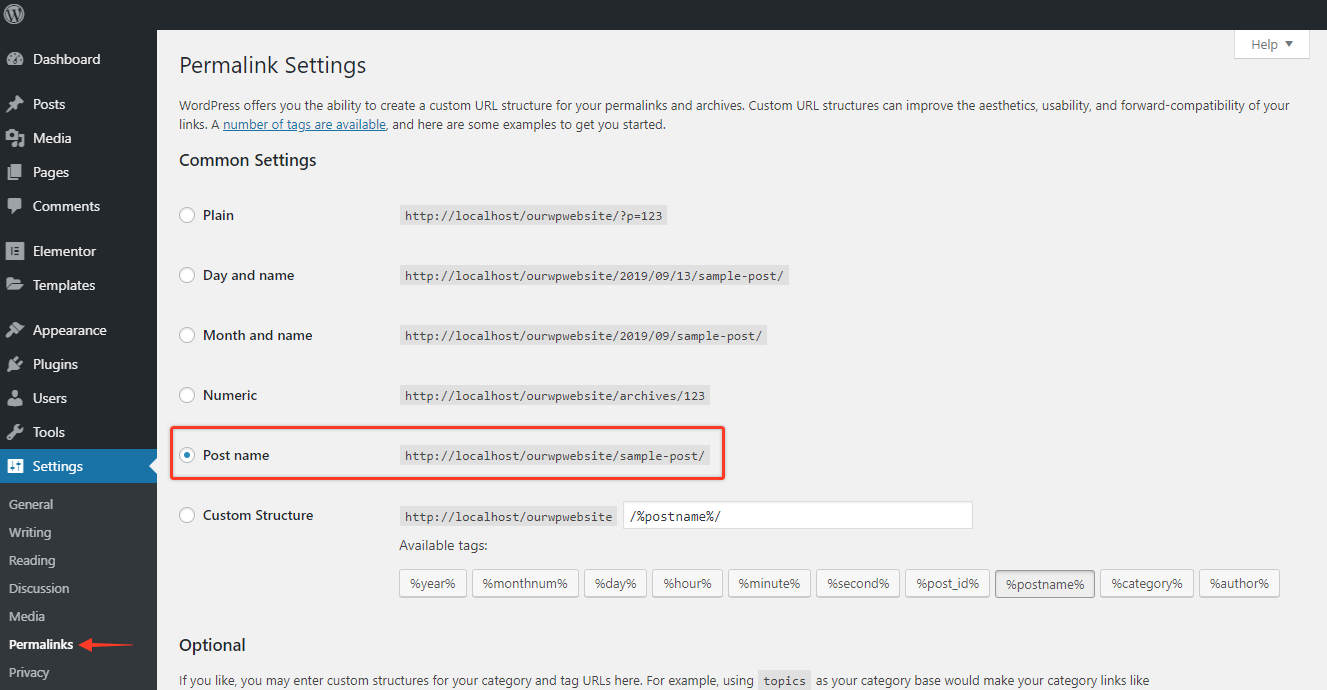
6.4 Permalink Settings
Here is another default setting that you can customize – your site’s permalinks.
A Permalink is the “permanent link” of your posts and pages. This is the format that shows up when someone visits a particular page or post on your website.
If you are not a news site, and you are not relying on timely content – then the best recommended format would the “Post Name” option as highlighted in the image below.
Once selected, this will customize each new page or post as you are creating them. You do have the choice to customize the URL of each page as you are creating them.
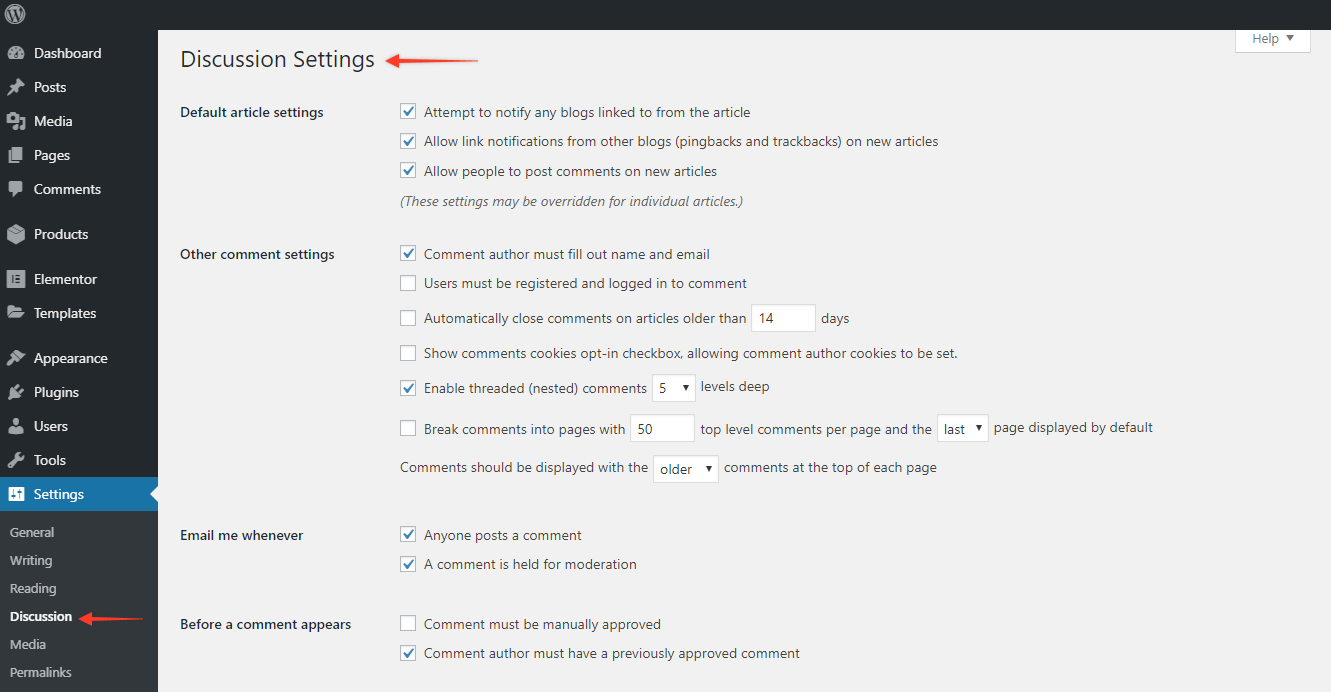
6.5 Discussion Settings
About 20% of the content on WordPress sites comes from the comments section.
Comments are how your readers interact with your articles, pages, etc..
There are many reasons to keep comments turned on on your website.
The primary reason is that it is an effective way to communicate with your readers.
Under the Discussions Settings, you can set how you want to display and moderate comments.
Let’s leave these settings as the defaults for now (as you can see in the image below).
You can come back and change them in the future.
6.6 Privacy Settings
In a post-GDPR world – privacy is on everyone’s mind.
As a website owner, this is not something you should ignore as well. Why not start your website journey with minimal headaches?
Thankfully, WordPress provides you a template that you can build on.
Head over to your WordPress Dashboard.
Under Settings choose Privacy.
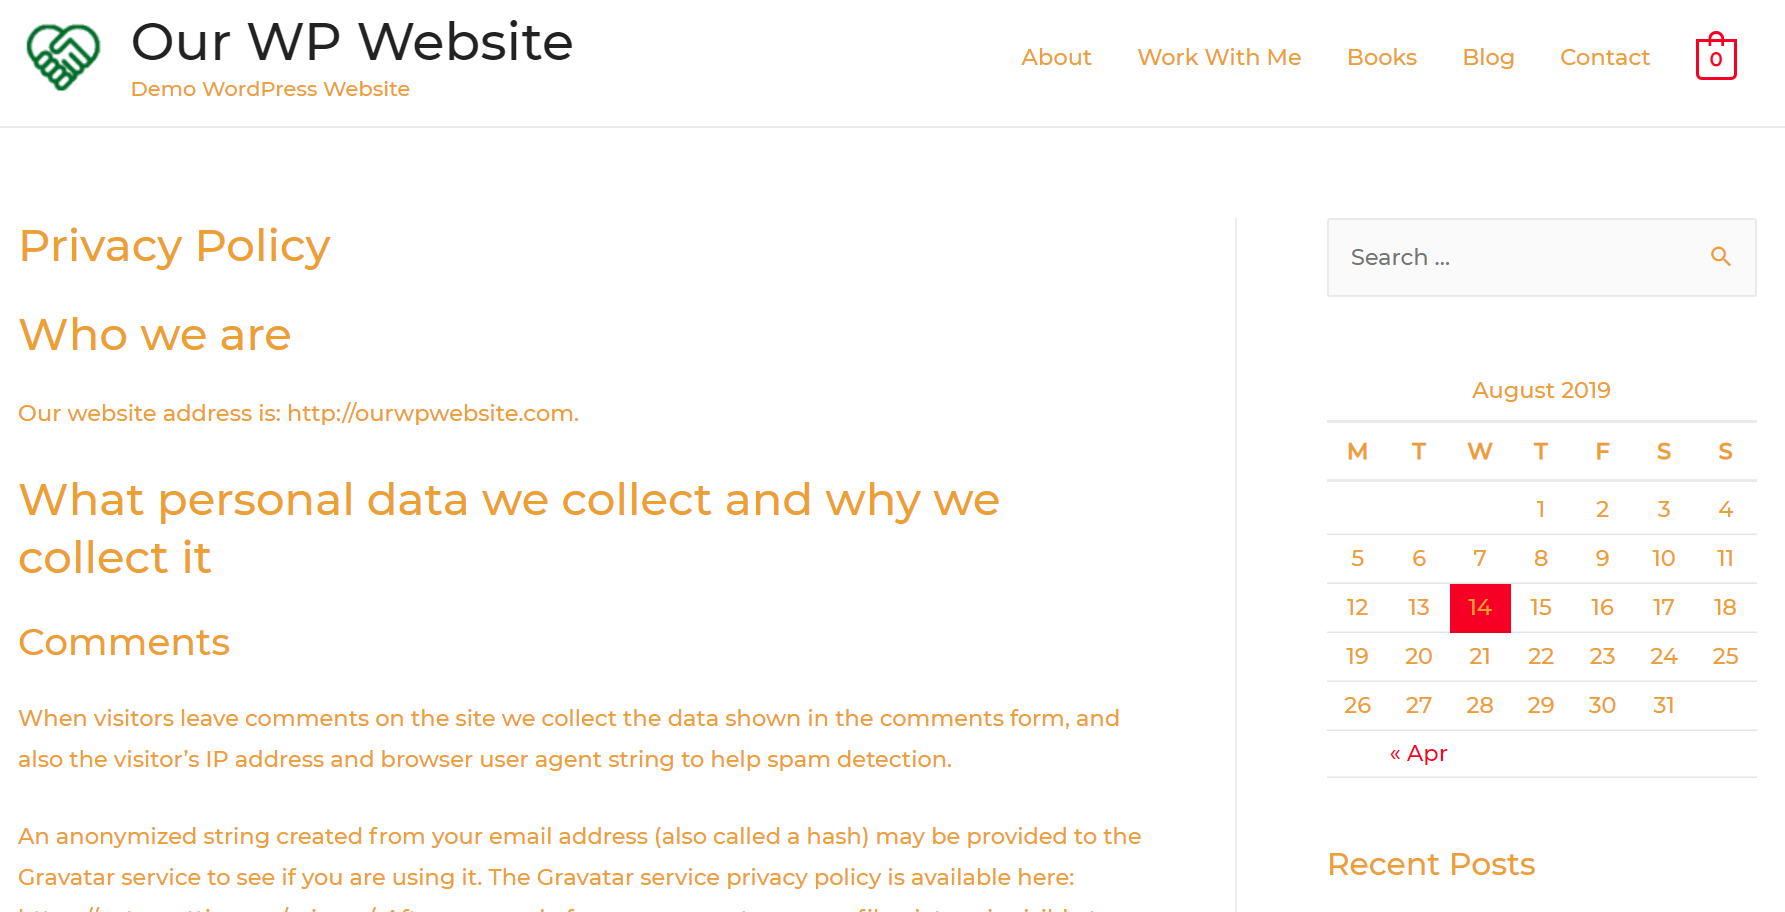
Next, click the Preview button to see the current privacy policy.

This is the default “Privacy Policy” that comes pre-built in your template.
You have the flexibility to make changes to your policy based on your business, industry or region.
Additional Questions – What is the difference between page a post?
So far, we have shown you how to update page layouts, blog post layouts, etc.
To clarify any doubts you have – page(s) and post(s) are different in terms of their purpose and also how they are displayed on your website.
A Post is timely and usually has a date associated with it, and have a public author.
A Page on the other end is for static and timeless content.
It doesn’t display a public author or an associated date.
Choosing whether to have a blog and posts is totally up to. It depends on your business.
However, you cannot have a website without having at least a few pages.
Here are the basic pages you must start with for any website:
- A Home Page
- An About us Page
- A Contact us Page
- A Privacy Policy Page (which we have covered above)
STEP 7 – Update your Menus & Widgets
What are Menus, and how to update them?
You want to make it easier for your visitors to find information on your website, right?
Here’s where Menus are effective and they are widely used in most websites.
In most cases, they show up in the header (top navigation) of your website.
By default, the Astra themes come with default menus.
You can customize the names of the menu as well as how they are displayed.
Head over to your WordPress Dashboard. Under Appearance and choose “Customize”.
It will then display all the available Menus.
For the website that we are building in this example, there is only a Main Menu.
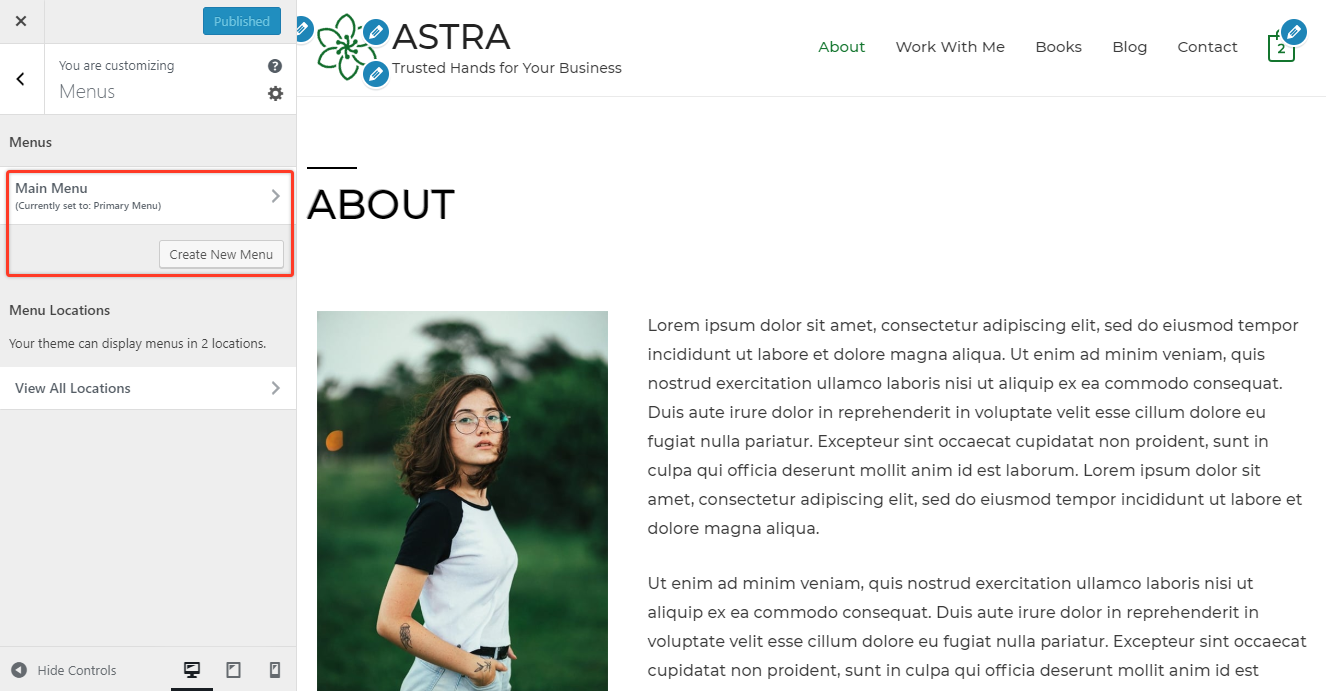
Click Main Menu and then it displays all the default items in the current menu.
You have the option to make changes to the menu right from this screen.

You can also make changes to the position of the Menus by using the Reorder option.
In the same screen – you are also able to add additional menu items.

The goal of optimizing the Menu bar is to make it simpler for your visitors to find information on your website.
What are Widgets, and how to update them?
Have you visited a particular website and you notice that they have some elements on the sidebar? It’s either:
- A Search Bar
- A specific call-to-action
- A list of all their social media
- A list of recent posts
This could be set up using Widgets, and it allows you to customize how the sidebar looks like.
The default WordPress widgets are sufficient for many sites.
However, you will notice additional options based on the theme you have installed.
Head over to your WordPress Dashboard.
Under Appearance and choose “Widgets”.
You will notice the list of current widgets on the right-hand side under “Main Sidebar”

On the left-hand side, there is a slew of options, and you can simply drag and drop the ones that you feel are relevant to the Main Sidebar.
It is also simple to customize any of the existing widgets.
Click on any of the widgets.
We will choose the Recent Posts widget, and you will notice that it expands.
You can choose how many posts you want to display at any time, and also if you want to display the published dates or not.

STEP 8 – Install Plugins
What are plugins?
WordPress allows you to quickly set up a website using it’s free CMS.
However, there are limitations of what you can do out-of-the-box.
To fill the gaps with functionalities – WordPress offers a library of plugins.
A plugin is a software (some free, some paid) that you can install on your WordPress website to enhance the functionality of your site.
It is estimated there are over 55000 plugins to choose from the WordPress library.
We recommend that you start with a few plugins to when launching your WordPress Website.
We have vetted and compiled a small list of must-have plugins you need to have on your website today.
This should at least get you started.
You are free to explore and choose more plugins as you grow your website, and also based on your goals and requirements.
How to install plugins?
You can install any of the plugins recommended by us
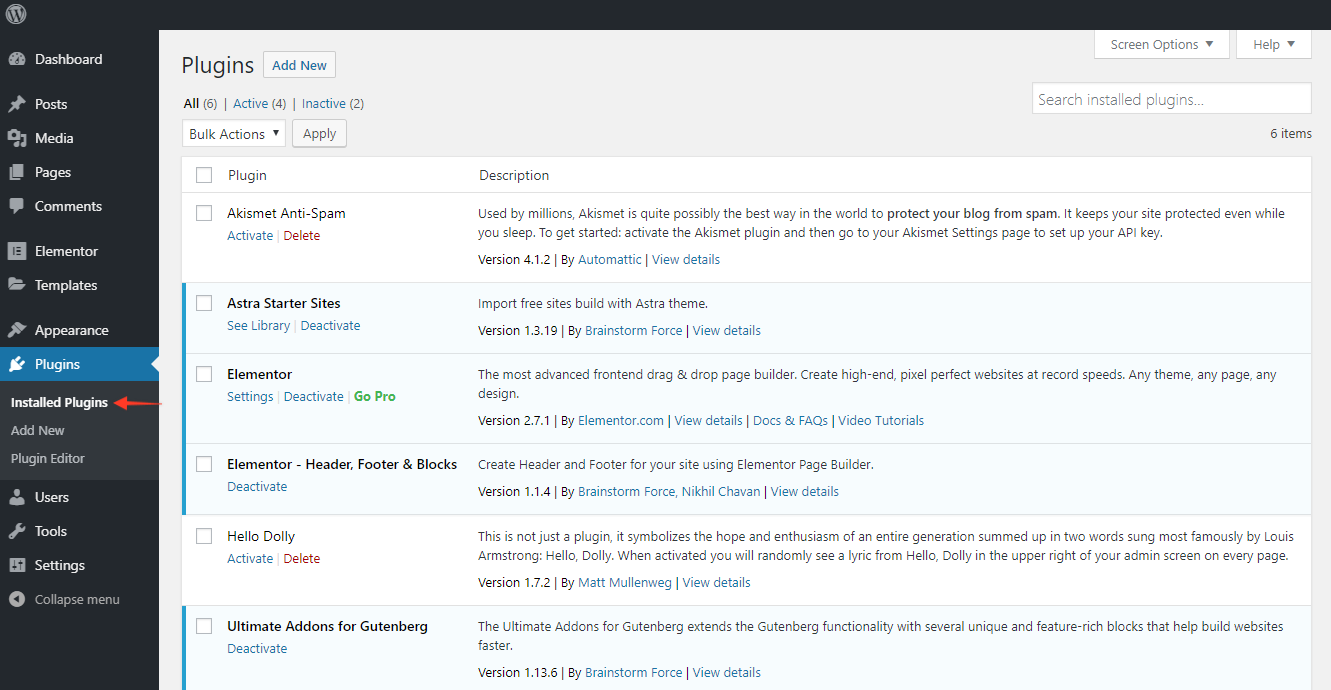
To install a plugin, head over to the WordPress Dashboard. Click on Plugins, and this will display the list of your existing plugins.
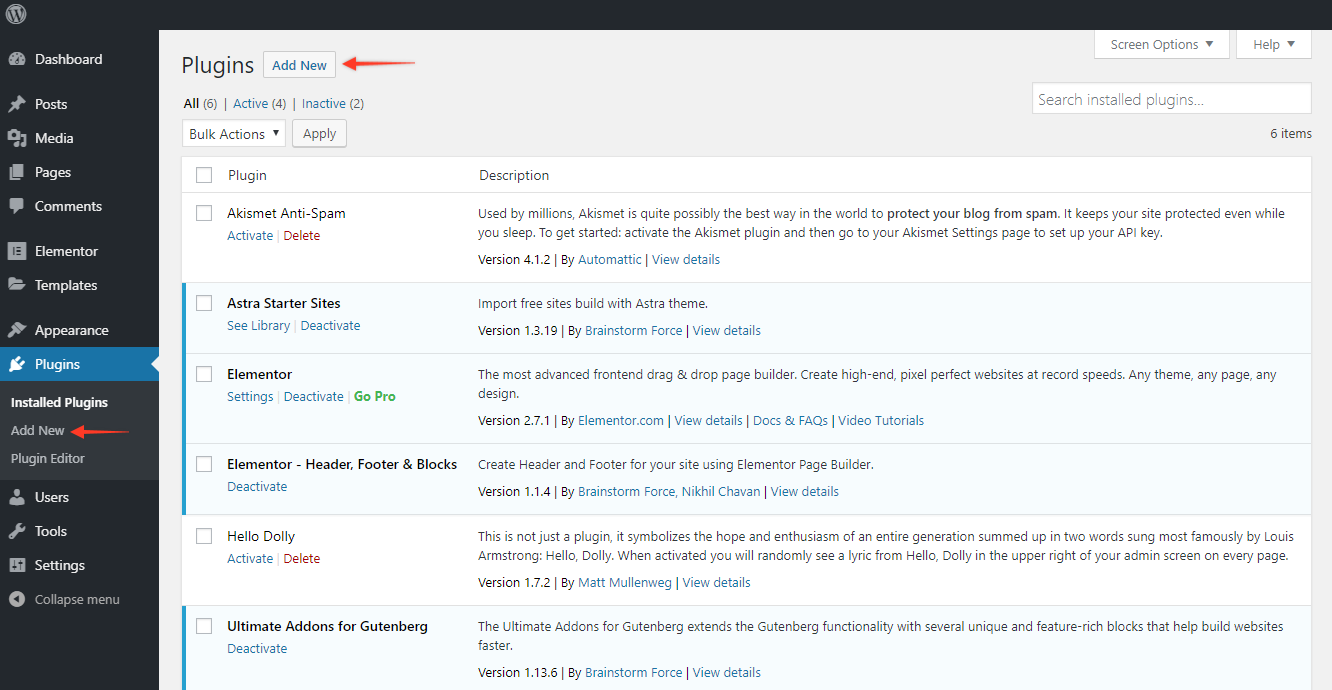
To search for and add new plugins, choose either of the two Add New buttons.
One is just below the Installed Plugins on the left sidebar.
The other is at the top of the page.
Of all the plugins we have recommended – backups are crucial
STEP 9 – Celebrate the Launch of your new WordPress Website
There you go – as promised we have shown you how to create your own WordPress website.
Congratulations you have just learnt how to make a WordPress Website (and you can do all this is less than an hour)
If at any time during your setup you need guidance, you can refer back to this guide for any help.