ASP.NET Core is a significant redesign of ASP.NET. It is a new open-source and cross-platform framework for building modern cloud-based internet connected applications, such as web apps, IoT apps and mobile backends.
Some Points to know about ASP.NET Core
- No longer based on Web.dll.
- Based on a set of granular and well factored NuGet.
- First time ever ASP.NET is supported on Windows, Mac and Linux with a fully cross-platform ASP.NET Core.
- Has the ability to host on IIS or self-host in your own process.
- Designed to integrate seamlessly with a variety of client-side frameworks, including AngularJS, KnockoutJS and Bootstrap.
- Includes Web API and MVC but doesn’t yet have SignalR. It doesn’t yet support VB or F#.
- Built-in dependency injection.
- Open source and community-focused.
As a developer, I can understand it’s better to have a working example. So let’s start creating an application using ASP.NET CORE.
Step 1: Install VS2015 (Visual Studio 2015 Home page installer). Skip this step if you already have it.
Step 2 : Install .NET Core + Visual Studio tooling.
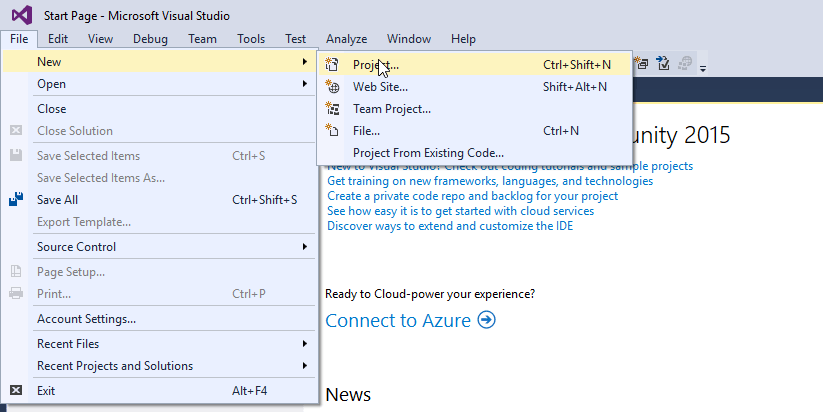
Step 3: Create a New Project
Open VS2015. From File Menu Select New -> Project. From Templates select >netCore and the ASP.NET Core web application. Name that project ParkingSys.

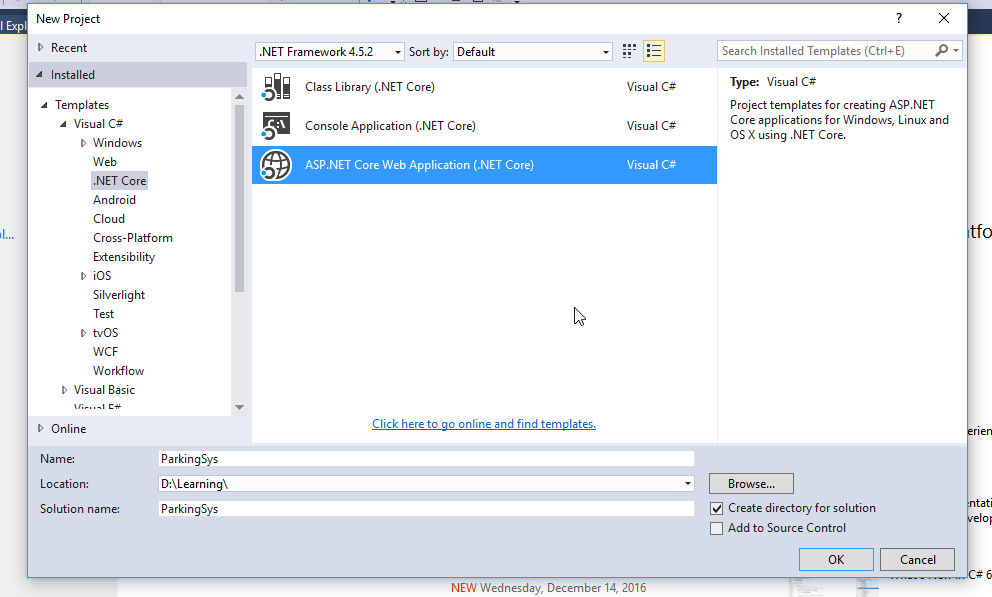
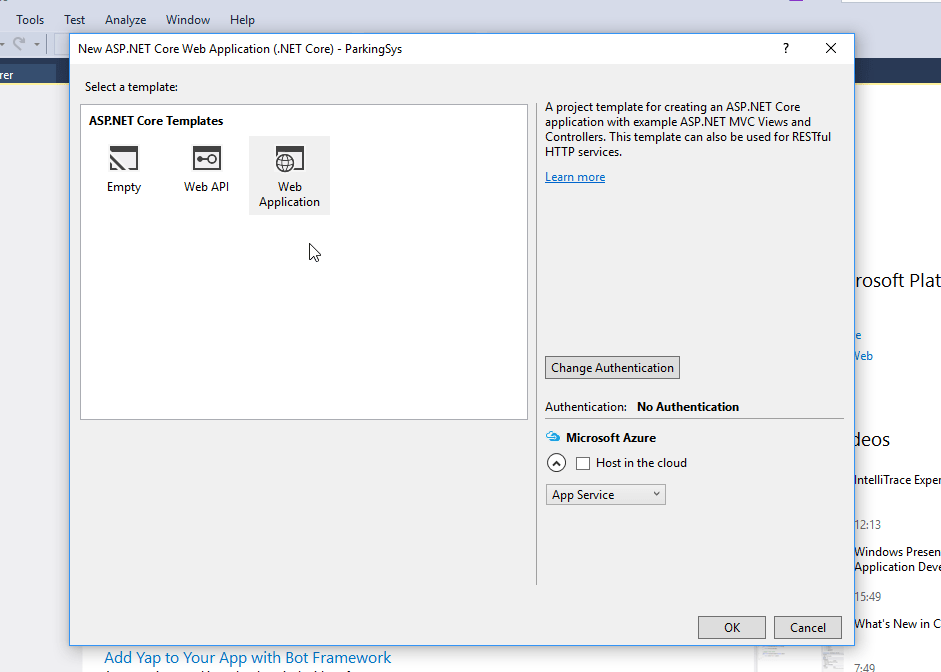
After clicking OK, below window will popup.
- Select Web Application
- Uncheck Host In the cloud
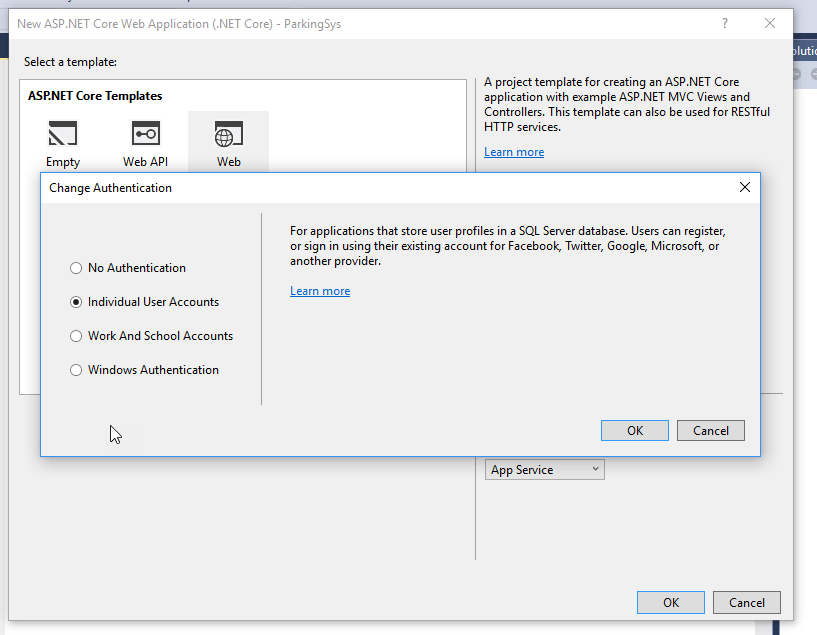
- Change Authentication to Individual User Account.
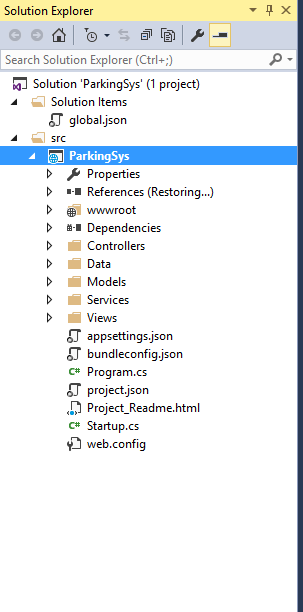
Step 4: Now solution Explorer will look like the below image.
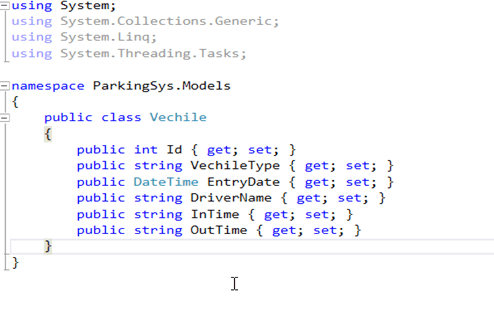
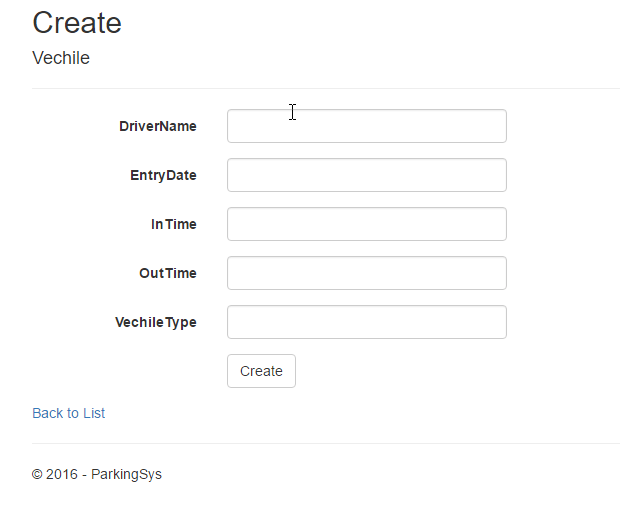
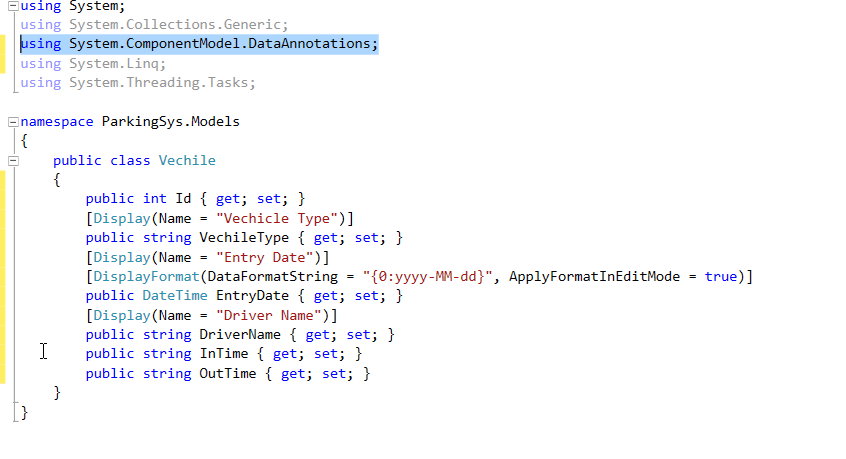
Step 5: Create new model named Vechile and add the following Code in that.

Step 6: Create Vechile Controller.
- Right click on Controller Folder.Add -> New Scaffolder Item.

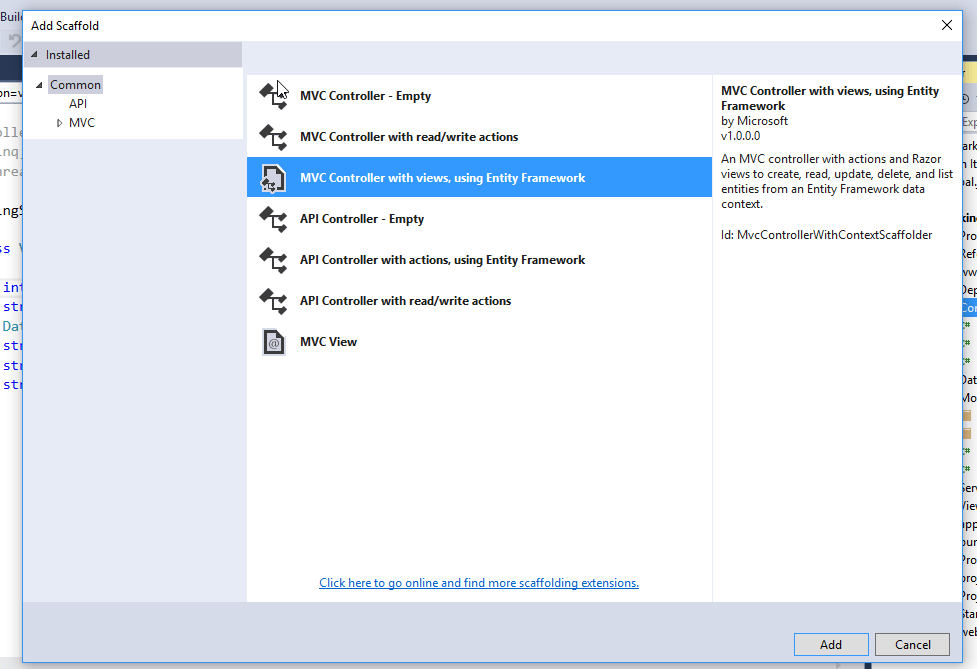
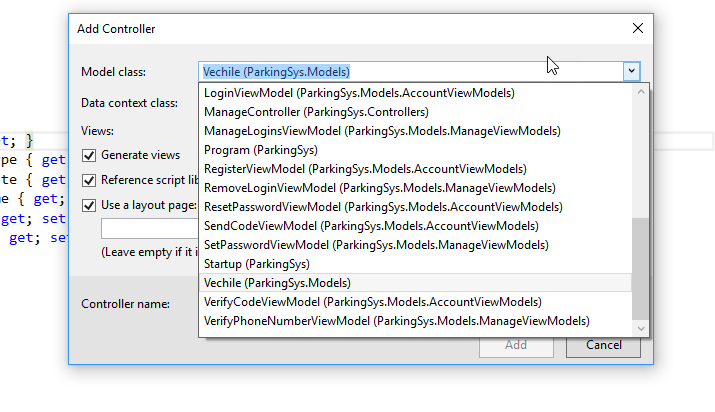
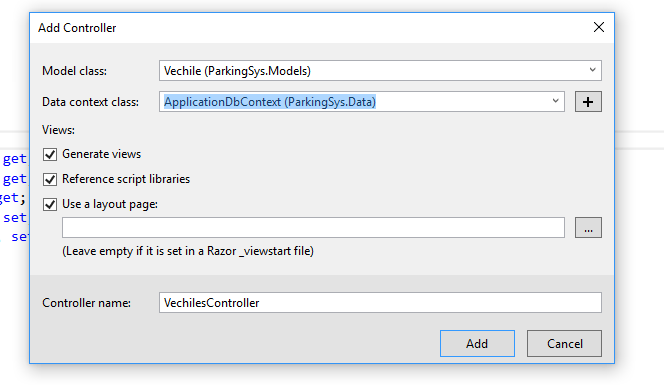
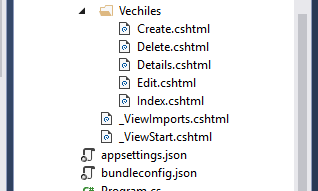
By following the above steps It will generate all CRUD views and controller for Vehicle.
Step7: Add Migration
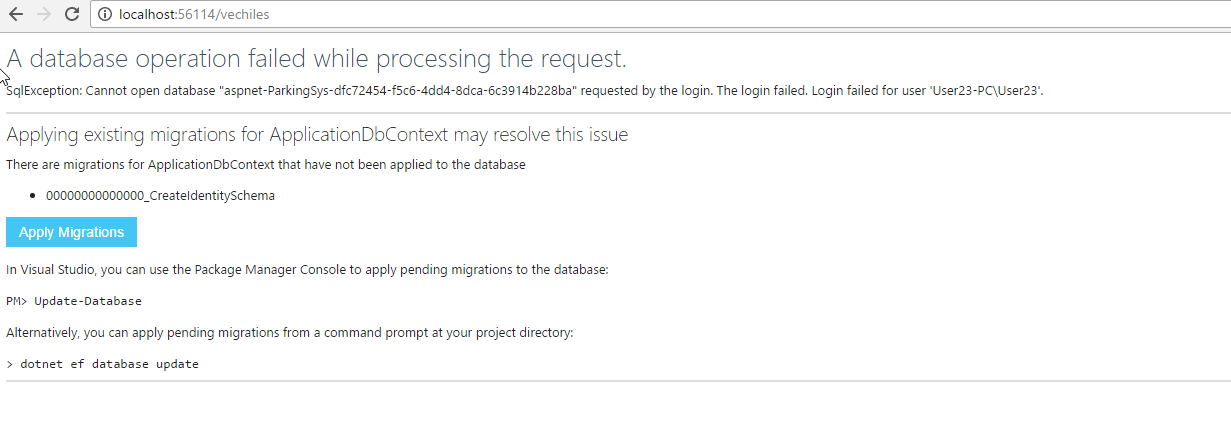
- After this try to Run the project by clicking IIS Express as already I mentioned ASP.NET Core has ability to host on IIS or self-host in your own process.

You can see the below error. For this we need to apply Migration first.
Lets first change the ConnectionString .Open appsettings.json File and make the below change:
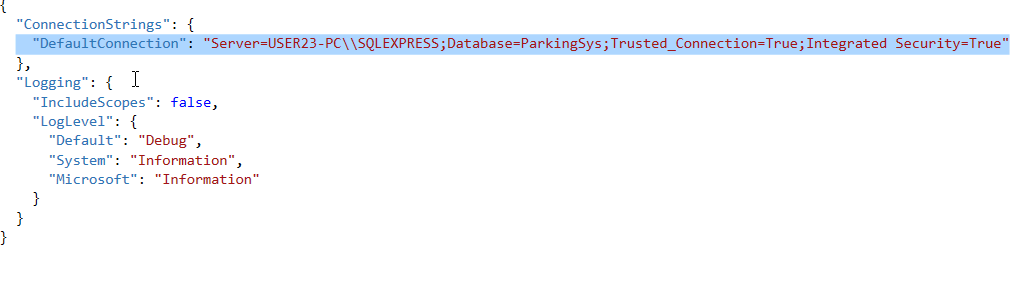
Here in Server you can give the name of your server. After making this change we will Apply Migrations.
You can run the migration in Console or in Command Prompt.

We Need to run the following Commands, first navigate to your project directory:
- dotnet ef migrations add Initial : Runs the Entity Framework .NET Core CLI migrations command and creates the initial migration. The parameter “Initial” is arbitrary, but customary for the first (initial) database migration. This operation creates the Data/Migrations/_Initial.cs file containing the migration commands to add (or drop) the Vechile table to the database
- dotnet ef database update: Updates the database with the migration we just created
After this if you test your application it will run fine.
Step 8: Make changes in layout view
Right now ASP.NET core has provided us default template. So we can make changes to that layout according to our requirement.

Have removed the About and Contact link and added the link for opening Vechile Index Page.

Step 9: Make change in Model Vechile.
- Run the app and open the Create Page. Here if we want to Display DriverName as Driver Name then we need to make change in our Model class
After making the above changes in Vechile Model the page look like:
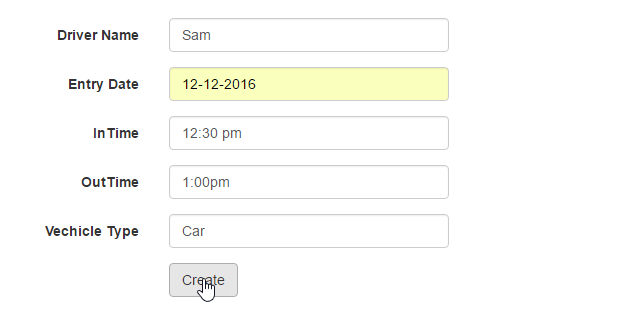
After Clicking Create it will be displayed on Index page list.

Step 10 : Add Authorization to access Vechile.
If you remember, while clicking the project we have selected the Individual User account by which we get Account Views and controller in our project. So now we have to just add authorization to our controller that if you are not logged in then he/she will not be able to access any vechile page.
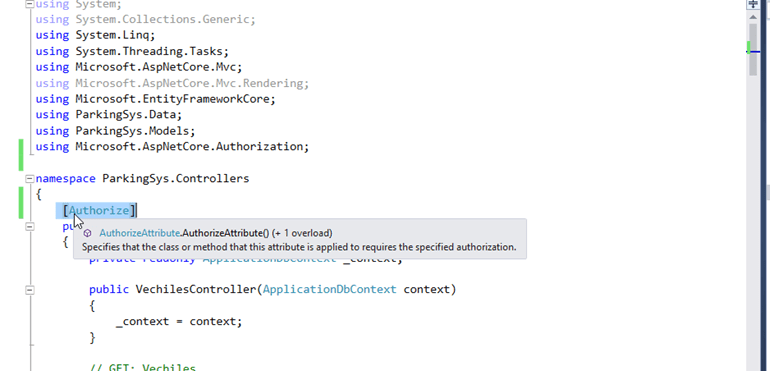
For this I have just added the attribute [Authorize]
Now try when you try to open Vechile page without login it will redirect to Login page.

Do not have account just click Register as new use
Now lets discuss some Code that is added to Vehicle Controller.
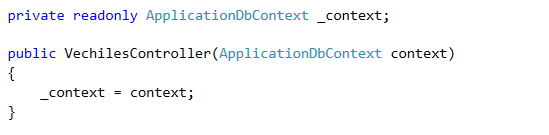
As mentioned in starting that Asp.net Core has Built-in dependency injection.As you see, constructor uses DI to inject the database context into the controller. The database context is used in each of the CRUD methods in the controller.
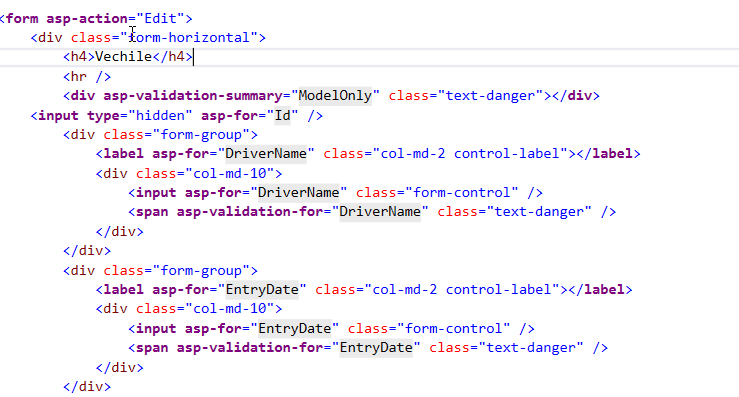
If you open any view you can see code like above image.
In Asp.net Core we have Tag Helpers. Tag Helpers enable server-side code to participate in creating and rendering HTML elements in Razor files.
Asp-action – Work same like Action
Asp-for – binds an HTML element to a model expression in your razor view.
There are many tag Helpers like Form Tag Helper, Input Tag Helper, Textarea Tag Helper etc.
That is all to start with ASP.NET Core. Hope this tutorial was helpful for you.