Ever heard the term robots.txt and wondered how it applies to your website? Most websites have a robots.txt file, but that doesn’t mean most webmasters understand it. In this post, we hope to change that by offering a deep dive into the WordPress robots.txt file, as well as how it can control and limit access to your site. By the end, you’ll be able to answer questions like:
What Is a WordPress Robots.txt?
Before we can talk about the WordPress robots.txt, it’s important to define what a “robot” is in this case. Robots are any type of “bot” that visits websites on the Internet. The most common example is search engine crawlers. These bots “crawl” around the web to help search engines like Google index and rank the billions of pages on the Internet.
So, bots are, in general, a good thing for the Internet…or at least a necessary thing. But that doesn’t necessarily mean that you, or other webmasters, want bots running around unfettered. The desire to control how web robots interact with websites led to the creation of the robots exclusion standard in the mid-1990s. Robots.txt is the practical implementation of that standard – it allows you to control how participating bots interact with your site. You can block bots entirely, restrict their access to certain areas of your site, and more.
That “participating” part is important, though. Robots.txt cannot force a bot to follow its directives. And malicious bots can and will ignore the robots.txt file. Additionally, even reputable organizations ignore some commands that you can put in Robots.txt. For example, Google will ignore any rules that you add to your robots.txt about how frequently its crawlers visit. If you are having a lot of issues with bots, a security solution such as Cloudflare or Sucuri can come in handy.
Why Should You Care About Your Robots.txt File?
For most webmasters, the benefits of a well-structured robots.txt file boil down to two categories:
- Optimizing search engines’ crawl resources by telling them not to waste time on pages you don’t want to be indexed. This helps ensure that search engines focus on crawling the pages that you care about the most.
- Optimizing your research usage by blocking bots that are wasting your server resources.
Robots.txt Isn’t Specifically About Controlling Which Pages Get Indexed In Search Engines
Robots.txt is not a foolproof way to control what pages search engines index. If your primary goal is to stop certain pages from being included in search engine results, the proper approach is to use a meta noindex tag or another similarly direct method.
This is because your Robots.txt is not directly telling search engines not to index content – it’s just telling them not to crawl it. While Google won’t crawl the marked areas from inside your site, Google itself states that if an external site links to a page that you exclude with your Robots.txt file, Google still might index that page.
John Mueller, a Google Webmaster Analyst, has also confirmed that if a page has links pointed to it, even if it’s blocked by robots.txt, might still get indexed.
How To Create And Edit Your WordPress Robots.txt File
By default, WordPress automatically creates a virtual robots.txt file for your site. So even if you don’t lift a finger, your site should already have the default robots.txt file. You can test if this is the case by appending “/robots.txt” to the end of your domain name.
Because this file is virtual, though, you can’t edit it. If you want to edit your robots.txt file, you’ll need to actually create a physical file on your server that you can manipulate as needed. Here are three simple ways to do that…
How to Create And Edit A Robots.txt File With Yoast SEO
If you’re using the popular Yoast SEO plugin, you can create (and later edit) your robots.txt file right from Yoast’s interface. Before you can access it, though, you need to enable Yoast SEO’s advanced features by going to SEO → Dashboard → Features and toggling on Advanced settings pages:
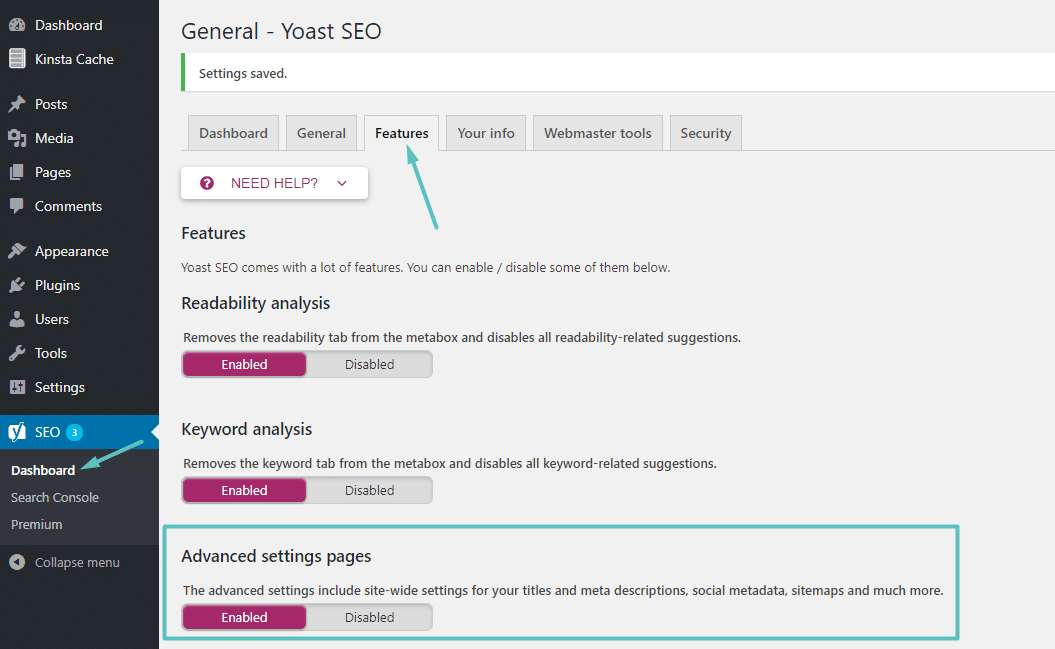
How to enable advanced Yoast features
Once that’s activated, you can go to SEO → Tools and click on File editor:
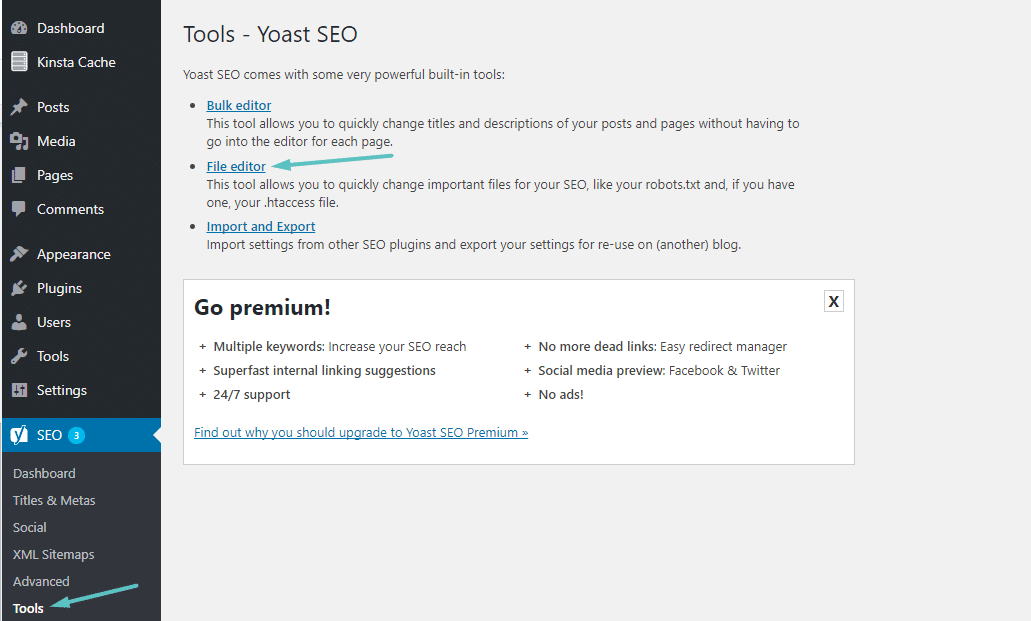
How to access Yoast file editor
Assuming you don’t already have a physical Robots.txt file, Yoast will give you an option to Create robots.txt file:
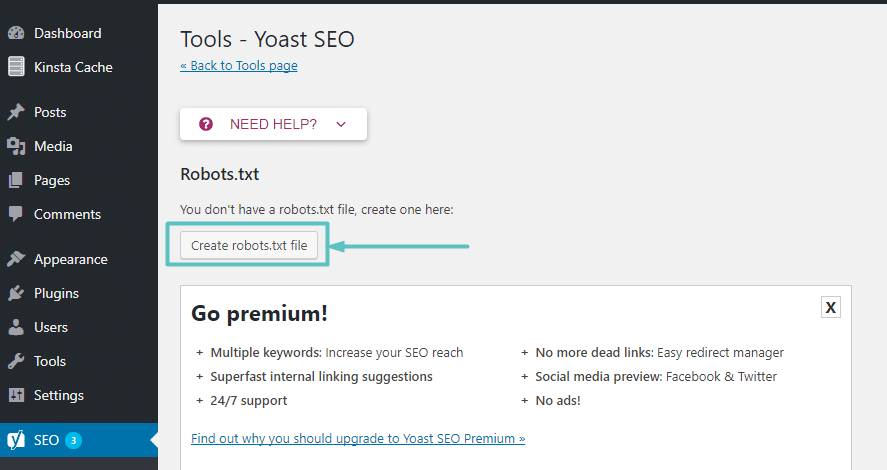
How to create Robots.txt in Yoast
And once you click that button, you’ll be able to edit the contents of your Robots.txt file directly from the same interface:
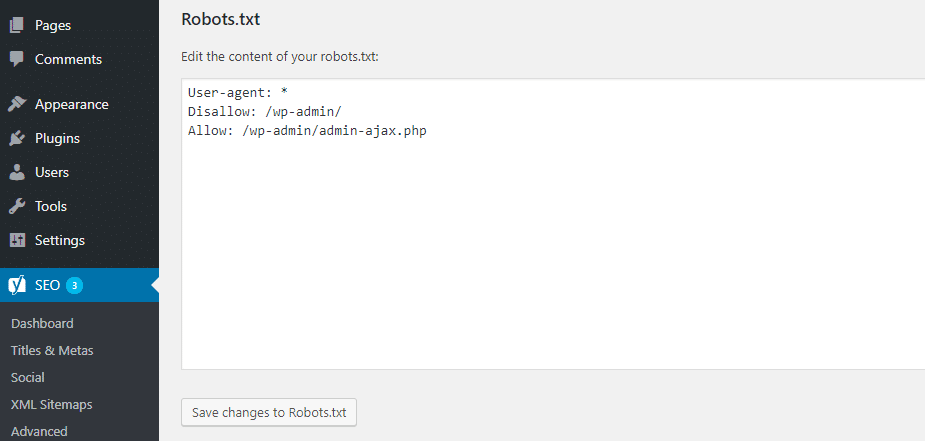
How to edit Robots.txt in Yoast
As you read on, we’ll dig more into what types of directives to put in your WordPress robots.txt file.
How to Create And Edit A Robots.txt File With All In One SEO
If you’re using the almost-as-popular-as-Yoast All in One SEO Pack plugin, you can also create and edit your WordPress robots.txt file right from the plugin’s interface. All you need to do is go to All in One SEO → Feature Manager and Activate the Robots.txt feature:
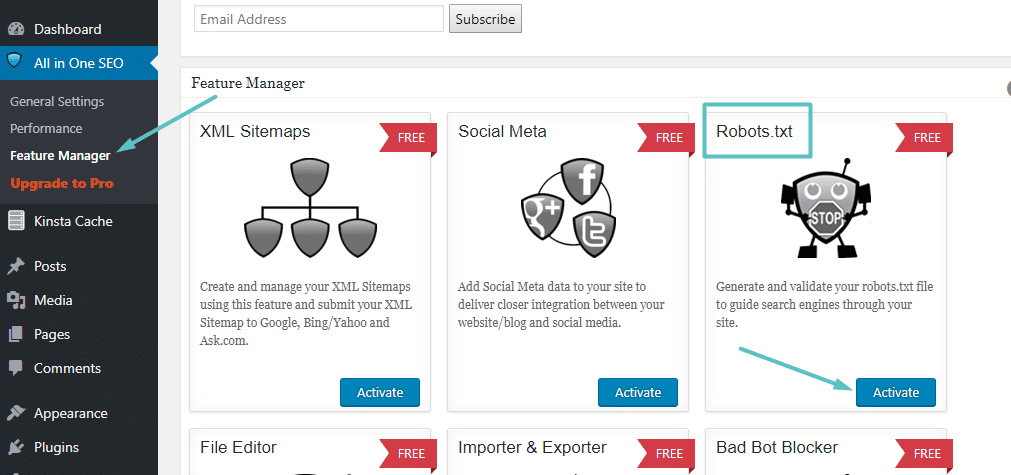
How to create Robots.txt in All In One SEO
Then, you’ll be able to manage your Robots.txt file by going to All in One SEO → Robots.txt:
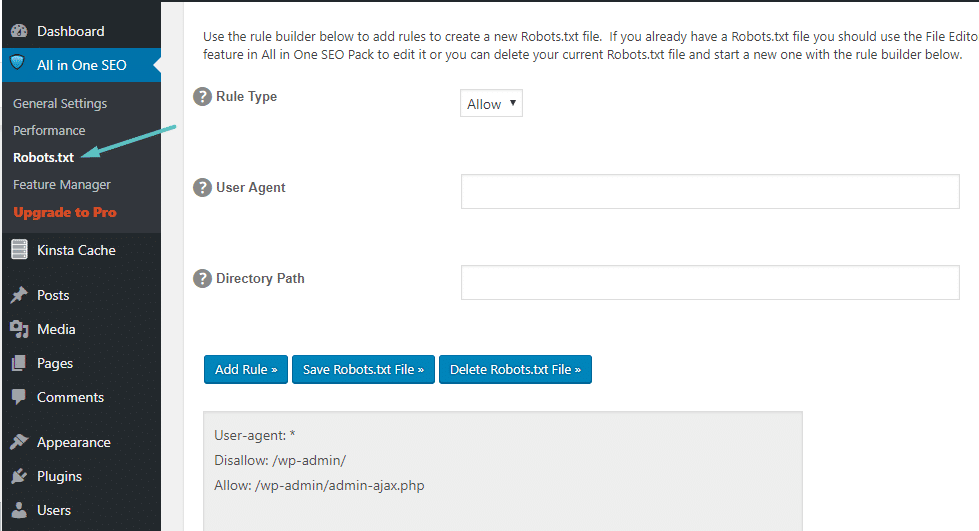
How to edit Robots.txt in All In One SEO
How to Create And Edit A Robots.txt File Via FTP
If you’re not using an SEO plugin that offers robots.txt functionality, you can still create and manage your robots.txt file via SFTP. First, use any text editor to create an empty file named “robots.txt”:
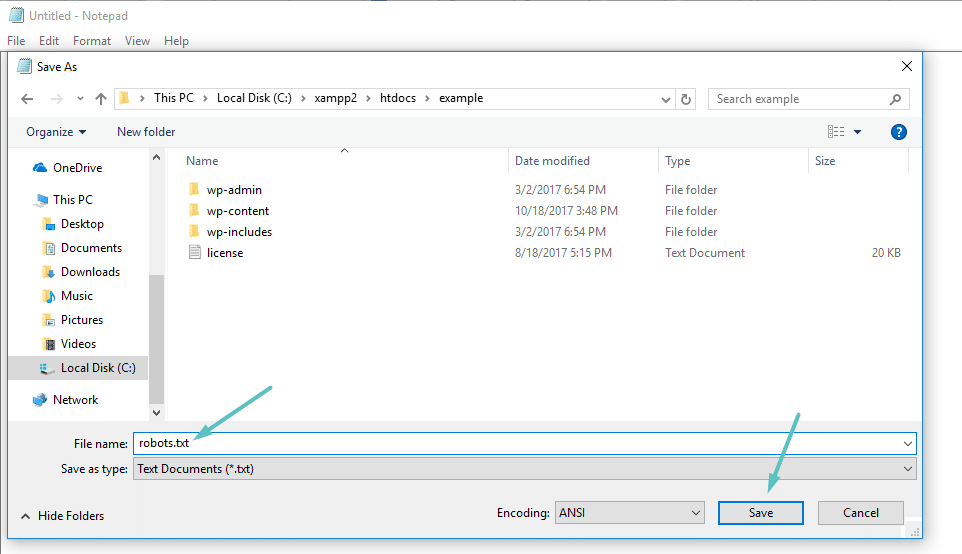
How to create your own Robots.txt file
Then, connect to your site via SFTP and upload that file to the root folder of your site. You can make further modifications to your robots.txt file by editing it via SFTP or uploading new versions of the file.
What To Put In Your Robots.txt File
Ok, now you have a physical robots.txt file on your server that you can edit as needed. But what do you actually do with that file? Well, as you learned in the first section, robots.txt lets you control how robots interact with your site. You do that with two core commands:
- User-agent – this lets you target specific bots. User agents are what bots use to identify themselves. With them, you could, for example, create a rule that applies to Bing, but not to Google.
- Disallow – this lets you tell robots not to access certain areas of your site.
There’s also an Allow command that you’ll use in niche situations. By default, everything on your site is marked with Allow, so it’s not necessary to use the Allow command in 99% of situations. But it does come in handy where you want to Disallow access to a folder and its child folders but Allow access to one specific child folder.
You add rules by first specifying which User-agent the rule should apply to and then listing out what rules to apply using Disallow and Allow. There are also some other commands like Crawl-delay and Sitemap, but these are either:
- Ignored by most major crawlers, or interpreted in vastly different ways (in the case of crawl delay)
- Made redundant by tools like Google Search Console (for sitemaps)
Let’s go through some specific use cases to show you how this all comes together.
How To Use Robots.txt To Block Access To Your Entire Site
Let’s say you want to block all crawler access to your site. This is unlikely to occur on a live site, but it does come in handy for a development site. To do that, you would add this code to your WordPress robots.txt file:
User-agent: *
Disallow: /
What’s going on in that code?
The *asterisk next to User-agent means “all user agents”. The asterisk is a wildcard, meaning it applies to every single user agent. The /slash next to Disallow says you want to disallow access to all pages that contain “yourdomain.com/” (which is every single page on your site).
How To Use Robots.txt To Block A Single Bot From Accessing Your Site
Let’s change things up. In this example, we’ll pretend that you don’t like the fact that Bing crawls your pages. You’re Team Google all the way and don’t even want Bing to look at your site. To block only Bing from crawling your site, you would replace the wildcard *asterisk with Bingbot:
User-agent: Bingbot
Disallow: /
Essentially, the above code says to only apply the Disallow rule to bots with the User-agent “Bingbot”. Now, you’re unlikely to want to block access to Bing – but this scenario does come in handy if there’s a specific bot that you don’t want to access your site. This site has a good listing of most service’s known User-agent names.
How To Use Robots.txt To Block Access To A Specific Folder Or File
For this example, let’s say that you only want to block access to a specific file or folder (and all of that folder’s subfolders). To make this apply to WordPress, let’s say you want to block:
- The entire wp-admin folder
- wp-login.php
You could use the following commands:
User-agent: *
Disallow: /wp-admin/
Disallow: /wp-login.php
How to Use Robots.txt To Allow Access To A Specific File In A Disallowed Folder
Ok, now let’s say that you want to block an entire folder, but you still want to allow access to a specific file inside that folder. This is where the Allow command comes in handy. And it’s actually very applicable to WordPress. In fact, the WordPress virtual robots.txt file illustrates this example perfectly:
User-agent: *
Disallow: /wp-admin/
Allow: /wp-admin/admin-ajax.php
This snippet blocks access to the entire /wp-admin/ folder except for the /wp-admin/admin-ajax.php file.
How To Use Robots.txt To Stop Bots From Crawling WordPress Search Results
One WordPress-specific tweak you might want to make is to stop search crawlers from crawling your search results pages. By default, WordPress uses the query parameter “?s=”. So to block access, all you need to do is add the following rule:
User-agent: *
Disallow: /?s=
Disallow: /search/
This can be an effective way to also stop soft 404 errors if you are getting them.
How To Create Different Rules For Different Bots In Robots.txt
Up until now, all the examples have dealt with one rule at a time. But what if you want to apply different rules to different bots? You simply need to add each set of rules under the User-agent declaration for each bot. For example, if you want to make one rule that applies to all bots and another rule that applies to just Bingbot, you could do it like this:
User-agent: *
Disallow: /wp-admin/
User-agent: Bingbot
Disallow: /
In this example, all bots will be blocked from accessing /wp-admin/, but Bingbot will be blocked from accessing your entire site.
Testing Your Robots.txt File
You can test your WordPress robots.txt file in Google Search Console to ensure it’s setup correctly. Simply click into your site, and under “Crawl” click on “robots.txt Tester.” You can then submit any URL, including your homepage. You should see a green Allowed if everything is crawlable. You could also test URLs you have blocked to ensure they are in fact blocked, and or Disallowed.
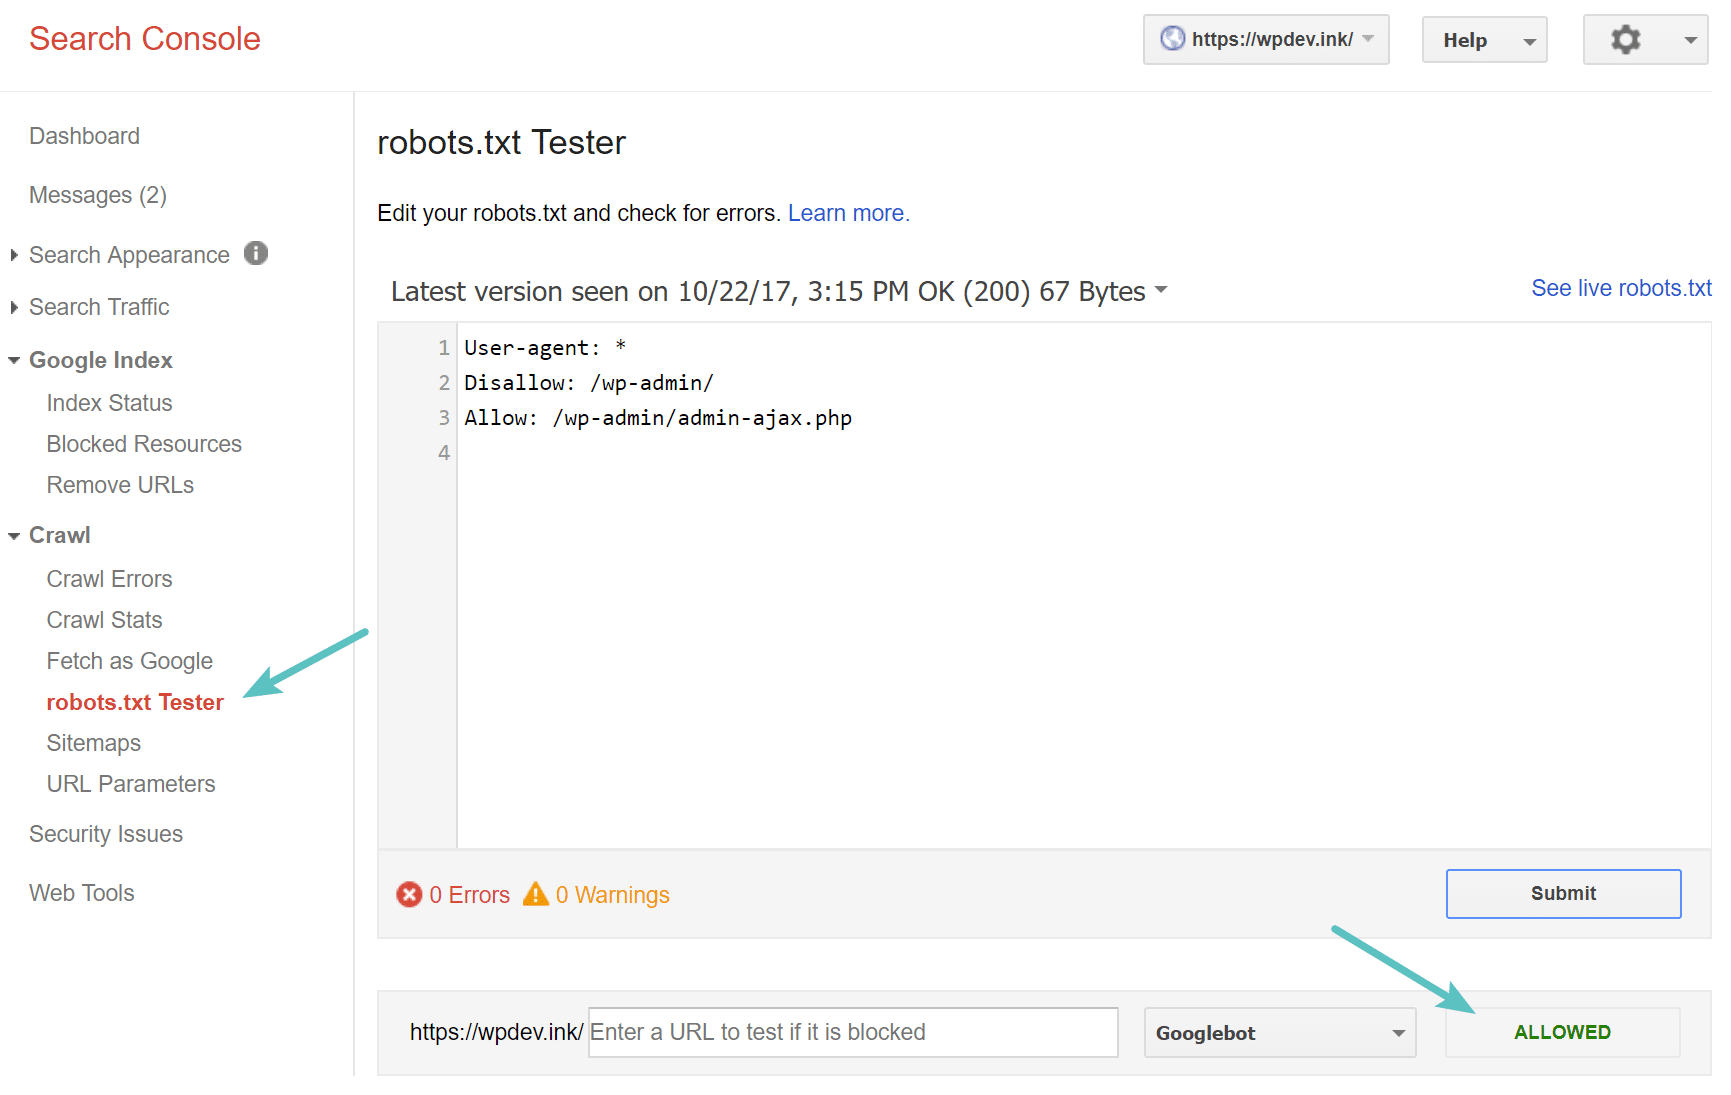
Test robots.txt file
Beware of the UTF-8 BOM
BOM stands for byte order mark and is basically an invisible character that is sometimes added to files by old text editors and the like. If this happens to your robots.txt file, Google might not read it correctly. This is why it is important to check your file for errors. For example, as seen below, our file had an invisible character and Google complains about the syntax not being understood. This essentially invalidates the first line of our robots.txt file altogether, which is not good! Glenn Gabe has an excellent article on how a UTF-8 Bom could kill your SEO.

UTF-8 BOM in your robots.txt file
Googlebot is Mostly US-Based
It’s also important not to block the Googlebot from the United States, even if you are targeting a local region outside of the United States. They sometimes do local crawling, but the Googlebot is mostly US-based.
What Popular WordPress Sites Put In Their Robots.txt File
To actually provide some context for the points listed above, here is how some of the most popular WordPress sites are using their robots.txt files.
TechCrunch
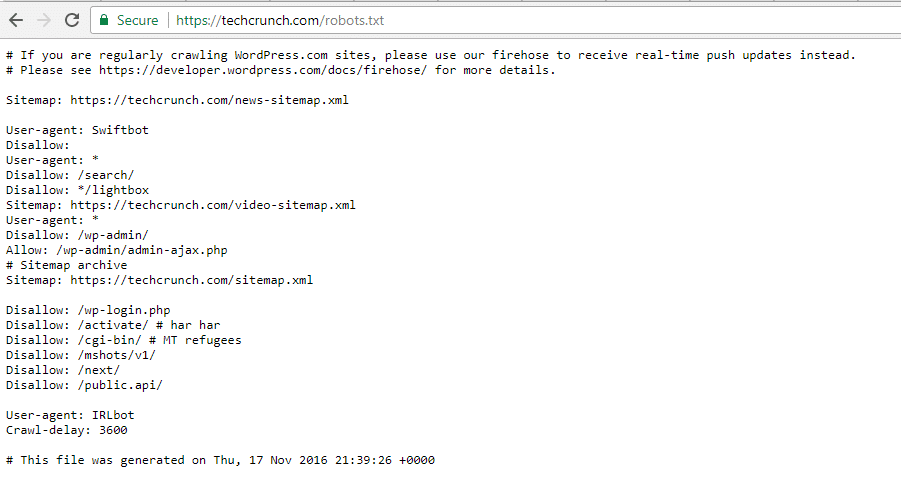
TechCrunch Robots.txt File
In addition to restricting access to a number of unique pages, TechCrunch notably disallows crawlers to:
- /wp-admin/
- /wp-login.php
They also set special restrictions on two bots:
- Swiftbot
- IRLbot
In case you’re interested, IRLbot is a crawler from a Texas A&M University research project. That’s odd!
The Obama Foundation
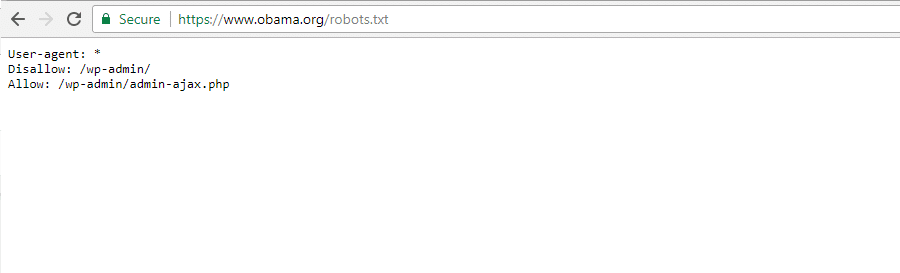
Obama Foundation Robots.txt File
The Obama Foundation hasn’t made any special additions, opting exclusively to restrict access to /wp-admin/.
Angry Birds
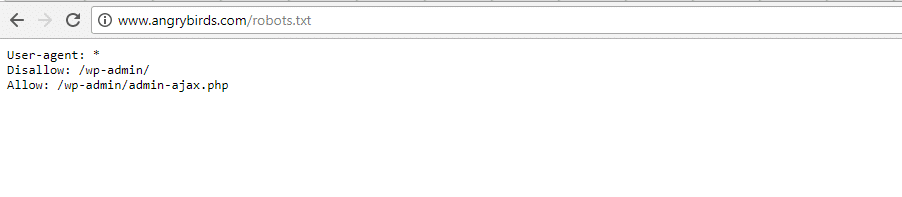
Angry Birds Robots.txt File
Angry Birds has the same default setup as The Obama Foundation. Nothing special is added.
Drift

Drift Robots.txt File
Finally, Drift opts to define its sitemaps in the Robots.txt file, but otherwise, leave the same default restrictions as The Obama Foundation and Angry Birds.
Use Robots.txt The Right Way
As we wrap up our robots.txt guide, we want to remind you one more time that using a Disallow command in your robots.txt file is not the same as using a noindex tag. Robots.txt blocks crawling, but not necessarily indexing. You can use it to add specific rules to shape how search engines and other bots interact with your site, but it will not explicitly control whether your content is indexed or not.
For most casual WordPress users, there’s not an urgent need to modify the default virtual robots.txt file. But if you’re having issues with a specific bot, or want to change how search engines interact with a certain plugin or theme that you’re using, you might want to add your own rules.
We hope you enjoyed this guide and be sure to leave a comment if you have any further questions about using your WordPress robots.txt file.